Astro MixAmp Pro TR Manual Firmware Update Guide
When everything is working properly, the Astro Command Center software automatically detects and installs firmware updates for your hardware. However, many users encounter endless loading screens, failed updates at 0%, or devices stuck in bootloader mode. In these scenarios, an astro mixamp pro tr manual firmware update is the most reliable way to restore functionality and ensure your device has the latest audio profiles and console compatibility fixes.

This guide walks you through the entire manual update process, including how to identify your hardware generation, source the correct firmware payload, and troubleshoot stubborn installation failures.
Why Perform a Manual Firmware Update?
The automated update process inside the Astro Command Center can fail for several reasons. Understanding the root cause helps you avoid repeating the same issue:
- Microsoft Store App Glitches: The Universal Windows Platform (UWP) version of the Astro Command Center distributed via the Microsoft Store frequently suffers from permission errors and network timeouts during payload downloads.
- Bootloader Mode Traps: If an automatic update is interrupted, your MixAmp may restart into Bootloader Mode. The software will detect the device as a generic bootloader and refuse to push the automated update.
- Next-Gen Console Compatibility: Key updates—such as firmware version 36797 for the Gen 4 MixAmp—enabled high-resolution USB audio for Xbox Series X|S and PlayStation 5, eliminating the strict requirement for an optical cable. If your device misses this update, performance on modern consoles is severely compromised.
- Corrupted Local Cache: Old temporary files can cause the updater to think the device is already up to date when it is actually running legacy code.
Pre-Update Checklist: Identify Your Generation
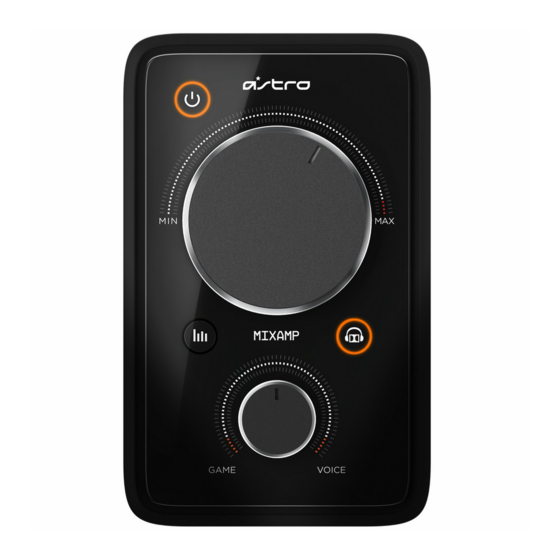
Flashing the wrong firmware file will cause an error or soft-brick your device. Astro produced two main variants of the MixAmp Pro TR. Check the physical design of your unit before downloading files:
Gen 3 (Released 2015)
The Gen 3 MixAmp Pro TR sits vertically. The power button is located on the top surface, and the master volume dial is on the left, while the Game/Voice balance dial is on the right. It comes in white (Xbox/PC) or black (PS4/PC).
Gen 4 (Released 2019)
The Gen 4 MixAmp Pro TR lies horizontally. The master volume dial is large and positioned on the left, with the Game/Voice balance dial on the right. Between the two dials are two small buttons: one for Dolby Audio processing/passthrough and one for EQ preset switching. It features a dark matte finish.
Requirements Before You Begin
Gather the following tools and assets before proceeding:
- A Windows PC or Mac: Windows 10 or 11 is recommended for the smoothest driver handshake.
- The Original Micro-USB Cable: Use a high-quality data cable. Many third-party cables only carry power and lack the data lines necessary for flashing firmware.
- Desktop Version of Astro Command Center: If possible, uninstall the Microsoft Store version and download the standalone desktop version (Win32 installer). The desktop version handles manual local file imports far more reliably.
- The Correct .afw File: Astro firmware updates use the
.afwfile extension. Download the appropriate file for your specific hardware generation from Astro's official support channels or verified community archives (such as the official Astro Gaming Reddit repository).
Step-by-Step Astro MixAmp Pro TR Manual Firmware Update
Once you have downloaded the correct .afw file to an easily accessible folder (such as your Desktop), follow these steps to flash your device manually.
Step 1: Connect the MixAmp to PC Mode
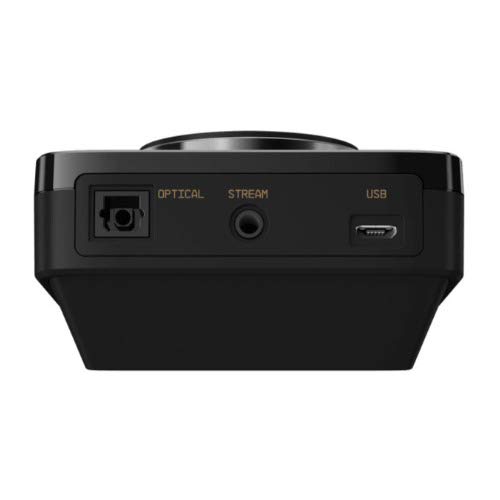
Ensure the toggle switch on the back of the MixAmp Pro TR is set to PC, not Console (PS4/PS5 or Xbox). Plug the USB cable directly into a motherboard USB port on the back of your computer. Avoid front-panel case ports, external USB hubs, or keyboard passthrough ports, as these can cause voltage drops during the flashing process.
Step 2: Launch Astro Command Center
Open the Astro Command Center software. If your device is running normally, the app will show your current firmware version in the top-left corner. If your device is stuck, it may display an alert reading "MixAmp Pro TR Bootloader detected."

Step 3: Open the Firmware File Dialog
Look at the top-right corner of the Command Center window:
- Click the Settings (Gear) icon.
- From the dropdown menu, select Update firmware manually.
- A file explorer window will open. Navigate to the directory where you saved your downloaded
.afwfile. - Select the file and click Open.
Step 4: Confirm and Execute the Flash
A prompt will appear showing the current firmware version alongside the new version you are about to install. Click Update to proceed.
During this stage:
- Do not disconnect the USB cable.
- Do not toggle the PC/Console switch.
- Do not close the Command Center window.
The update will cycle through several stages: verifying the file, putting the MixAmp into bootloader mode, erasing the old flash memory, writing the new blocks (Step 1 to Step 4), and restarting the device. Once completed, you will see an "Update Successful" dialogue.
Troubleshooting Common Manual Update Errors
If the update fails or halts mid-process, try these proven solutions.
MixAmp Pro TR Stuck in Bootloader Mode
If your MixAmp power button is pulsing amber or flashing white and the software identifies it strictly as "Bootloader Mode," do not panic. The hardware is designed with a recovery partition. Simply click the gear icon, select the manual update option, and load the .afw file directly. The software will skip the initial handshake and proceed straight to flashing the chip.
Update Stops at 0% or Fails Instantly
This is almost always a software communication conflict. Follow these remediation steps:
- Switch to a USB 2.0 Port: Modern USB 3.1/3.2 controllers (especially ASMedia or third-party chipsets) sometimes fail to maintain a steady stream with older audio controllers. A standard USB 2.0 port is significantly more stable for legacy firmware flashing.
- Run as Administrator: Right-click the Astro Command Center shortcut and select Run as Administrator to give the app full disk and USB interface privileges.
- Try Another Computer: If your primary PC fails repeatedly, test the update on a secondary laptop or a Mac. Once the firmware is written to the onboard memory, the MixAmp retains it permanently across all platforms.
Device Not Detected at All
If the Command Center does not register the MixAmp when plugged in, toggle the switch from Console to PC mode. If it is already on PC, press and hold the Power button for three seconds to cycle the device. If the LEDs do not light up, test a different micro-USB cable to eliminate a faulty power rail.
Post-Update Verification and Optimization
After the update finishes successfully, confirm that your settings and profiles are intact:
- Check the firmware number displayed at the top left of the interface to verify it matches the version you just flashed.
- Navigate through your four onboard EQ presets. Major firmware updates sometimes wipe customized acoustic curves back to factory defaults (such as Astro, Natural Bass, Balanced, and Tournament). Re-import your custom curves if necessary.
- Ensure the Stream Port settings reflect your desired mic/chat mix balance.
- Click the Sync to Device button in the left sidebar to commit all settings to the hardware memory.
By updating your device manually, you bypass software delivery bugs and keep your Astro MixAmp Pro TR performing at its peak across PC, PlayStation, and Xbox consoles.