Discover How to Easily Label the Skeleton Worksheet for Kids
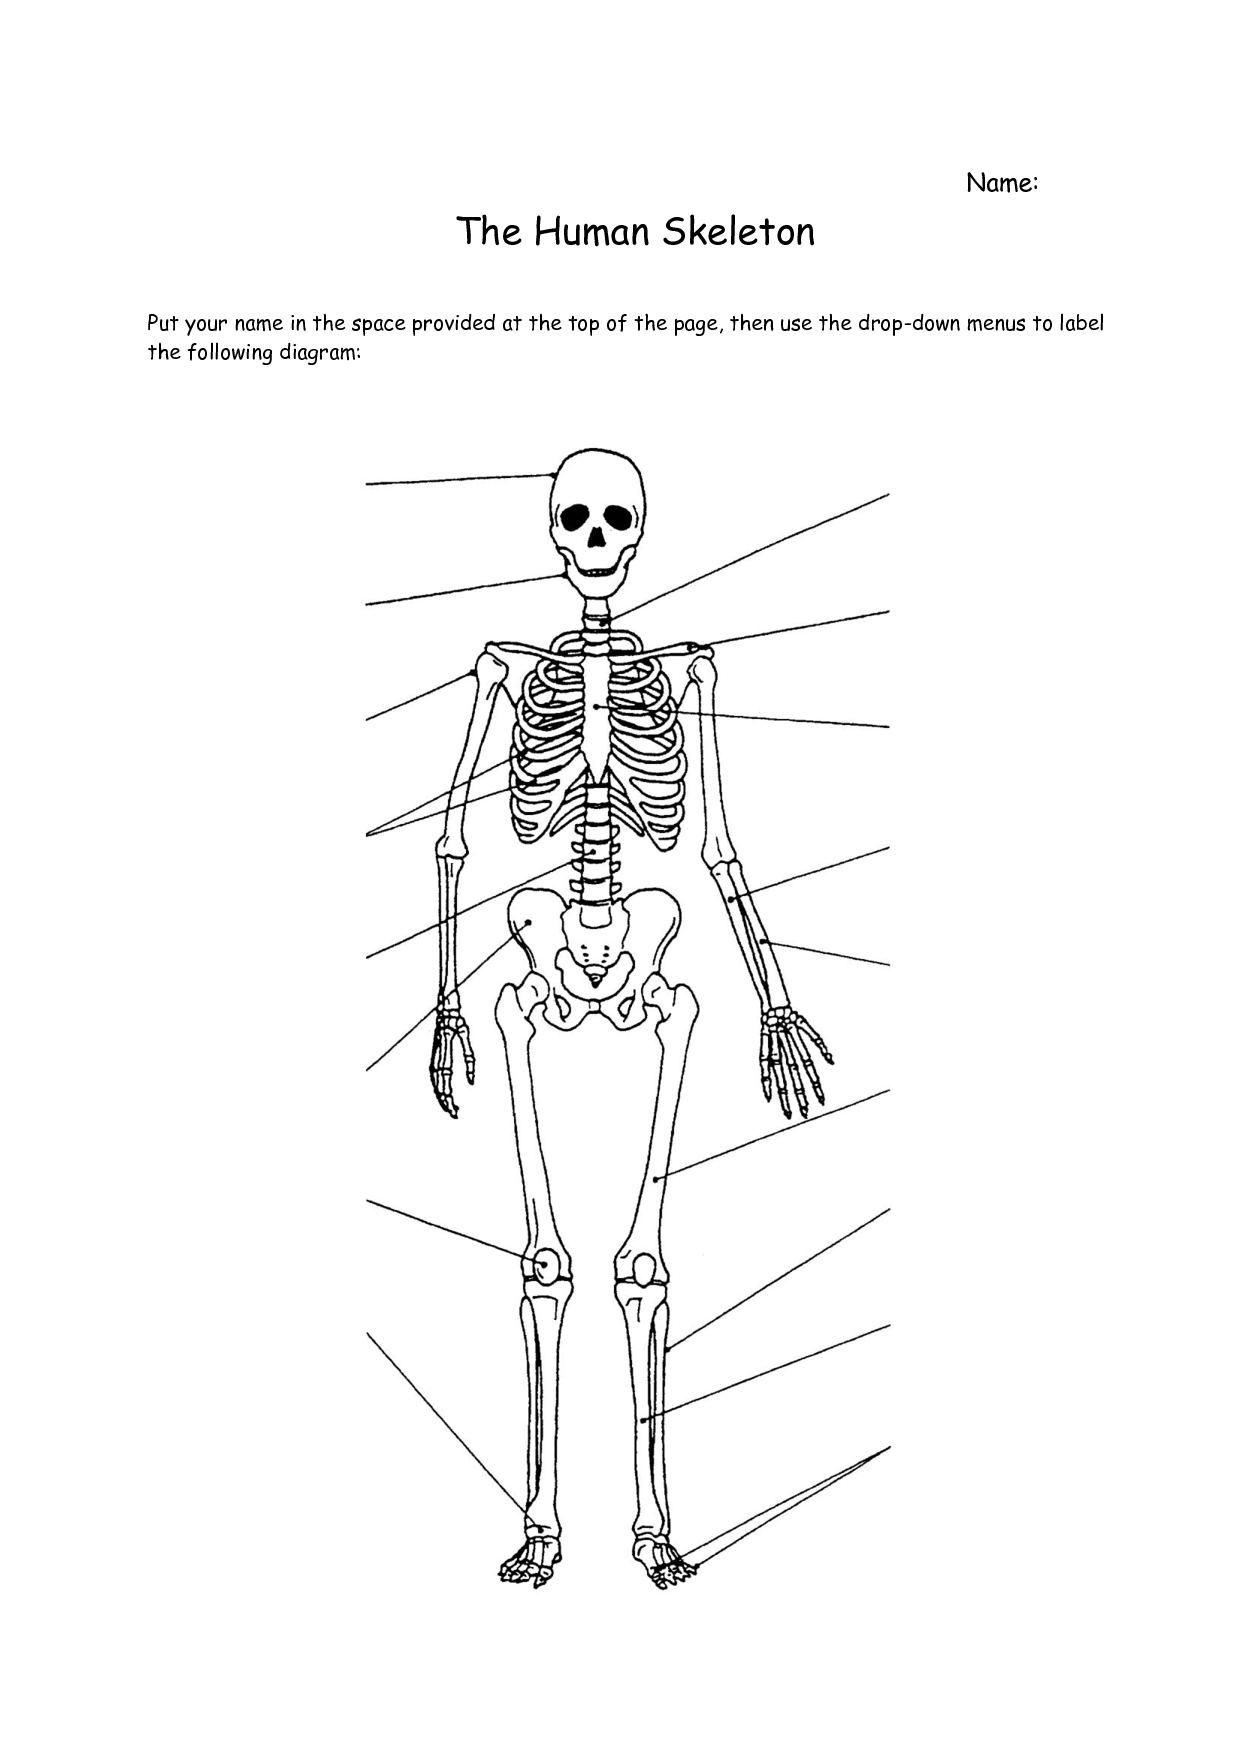
Staring at a blank diagram of the human body can intimidate even the most enthusiastic young science students. With over 200 bones in the adult body and a mountain of complex Latin terminology, anatomy lessons can quickly feel overwhelming. However, when you break the system down into bite-sized zones and memorable patterns, students grasp the material with ease. In this guide, you will discover how to easily label the skeleton worksheet for kids using intuitive strategies, memorable word associations, and a logical top-to-bottom sequence.

Why Labeling the Skeleton Is a Core Science Milestone
Labeling skeletal worksheets is more than just an exercise in memorization. It teaches children how biological systems provide structure, facilitate movement, and protect delicate internal organs. When students visually map bones on a page, they transition from viewing the body as a mystery to understanding it as an interconnected mechanical system.
Furthermore, hands-on labeling bridges the gap between everyday language and scientific vocabulary. Learning that the familiar "collarbone" is scientifically known as the "clavicle" builds academic confidence and prepares students for more advanced life science coursework in middle and high school.
Discover How to Easily Label the Skeleton Worksheet for Kids: A 4-Step Method
The biggest mistake kids make is jumping randomly around the diagram. Trying to identify a wrist bone, then a rib, then a toe creates cognitive overload. Instead, teach children to work systematically from the head down to the toes.
Step 1: Start at the Crown (The Skull and Neck)
Always begin at the top of the worksheet. Most elementary diagrams highlight two main features in this region:
- Cranium: The smooth, helmet-like portion of the skull that shields the brain.
- Mandible: The lower jawbone. Remind kids that the mandible is the only bone in the skull that can move, which helps us chew and talk.
Step 2: Map the Central Torso
Move straight down into the chest and core. The bones here are grouped around the body's midline and serve primarily as protective armor for vital organs.
- Clavicle: Located horizontally at the base of the neck, commonly known as the collarbone.
- Sternum: The flat "tie-shaped" breastbone right in the center of the chest.
- Ribs: The curved cage connecting toward the sternum that safeguards the heart and lungs.
- Vertebrae (Spine): The stack of small ring-like bones running straight down the back to keep the body upright.
Step 3: Track the Upper Limbs (Arms and Hands)
Once the central core is labeled, guide students out to the arms. Arm bones are frequently confused, so encourage kids to trace their own arms while labeling:
- Humerus: The single, long upper arm bone connecting the shoulder to the elbow.
- Radius: The forearm bone aligned with the thumb side.
- Ulna: The forearm bone aligned with the pinky finger.
- Carpals, Metacarpals, and Phalanges: The wrist (carpals), palm (metacarpals), and fingers (phalanges). Elementary worksheets often group these together simply as "hand bones" or "phalanges."
Step 4: Finish with the Lower Limbs (Pelvis, Legs, and Feet)
Video: The Human Skeletal System Quiz | Explore the Human Skeleton | Identify Bones and Their Functions
Finally, move to the bottom half of the diagram, where the largest load-bearing bones reside:
- Pelvis: The bowl-shaped hip structure that supports the spine.
- Femur: The heavy thigh bone, which is the longest and strongest bone in the human body.
- Patella: The small, rounded kneecap sitting between the upper and lower leg.
- Tibia: The thick, sturdy shinbone in the front of the lower leg.
- Fibula: The slender bone running alongside the tibia on the outer edge of the leg.
- Tarsals, Metatarsals, and Phalanges: The ankle (tarsals), arch of the foot (metatarsals), and toe bones (phalanges).
Kid-Friendly Mnemonics to Stop Confusing Tricky Bones
Children regularly mix up paired bones in the arms and legs. You can eliminate this confusion with a few simple memory hooks:
- Humerus vs. Humorous: The upper arm bone sounds just like "humorous" (funny). It sits right above the "funny bone" (the ulnar nerve). When kids remember that laughing is fun, they easily place the humerus at the top of the arm.
- Radius Follows the Rad Thumb: Give a "thumbs-up" gesture and say, "That is rad!" The radius is always on the thumb side of the forearm.
- Tibia is Tough: The tibia is the big, tough shinbone that takes the brunt of running and kicking. The fibula tells a "little fib" because it pretends to hold you up, but it is actually the thin, supportive sidekick.
- Carpals vs. Tarsals: You drive a car with your hands on the steering wheel (carpals in the wrist), and you tar a road with your feet walking on it (tarsals in the ankle).
Quick-Reference Table: Scientific vs. Common Names
Depending on grade level, your worksheet may ask for scientific terms, everyday terms, or both. Use this quick reference to help students translate between the two:
- Cranium: Skull / Braincase
- Mandible: Jawbone
- Clavicle: Collarbone
- Scapula: Shoulder blade
- Sternum: Breastbone
- Humerus: Upper arm bone
- Femur: Thigh bone
- Patella: Kneecap
- Tibia: Shinbone
- Fibula: Calf bone / Outer lower leg bone
Pre-Labeling Warm-Up Activities
Before handing out pencils and worksheets, spend ten minutes activating kinesthetic memory. Physical interaction dramatically increases label accuracy.
- Skeletal Simon Says: Play a round of Simon Says using anatomical names. Call out commands like "Simon says touch your patella" or "Simon says tap your clavicle." Kids physically locate the bones on themselves first, making the 2D worksheet intuitive.
- Butcher Paper Life-Size Outlines: Roll out large craft paper and have one student lie down while a partner traces their outline. Have students sketch and label major bones inside their life-sized silhouette before completing their individual worksheets.
- Color-Coded Highlighting: Before writing labels, have students lightly shade the arm bones in blue, leg bones in green, and torso bones in orange. Grouping by color prevents students from confusing limbs with the core body.
Frequently Asked Questions
How many bones should elementary students be expected to label?
Most elementary science curricula focus on 10 to 14 primary bones: cranium, mandible, clavicle, ribs, sternum, spine/vertebrae, pelvis, humerus, radius, ulna, femur, patella, tibia, and fibula. Detailed hand and foot bones (carpals, metacarpals, tarsals) are typically introduced in late middle school or high school biology.
What should I do if a student gets stuck between the radius and ulna?
Have the student lay their arm flat on the desk with palms facing up (standard anatomical position). Remind them of the thumb rule: the radius is always on the thumb side, rotating around the ulna when the wrist turns.
Empower Confident Young Scientists
Labeling anatomical diagrams does not have to be a dry chore of rote repetition. By following a structured head-to-toe progression, pairing common names with scientific terms, and using playful memory aids, children can master their skeleton worksheets quickly and retain that knowledge for years to come.


