Editable Toyota Celica Wiki A4 Page: Full Guide
Whether you are prepping your classic coupe for a local car meet, organizing your restoration receipts in a workshop binder, or drafting an eye-catching classified listing, an editable Toyota Celica wiki A4 page provides the perfect blend of authoritative encyclopedia styling and tailored vehicle history. Instead of relying on a generic car show placard, a Wikipedia-style one-page document organizes your vehicle's provenance, chassis specifications, factory options, and aftermarket modifications into a layout that enthusiasts instantly recognize and respect.
Why Use an A4 Wiki Format for the Toyota Celica?
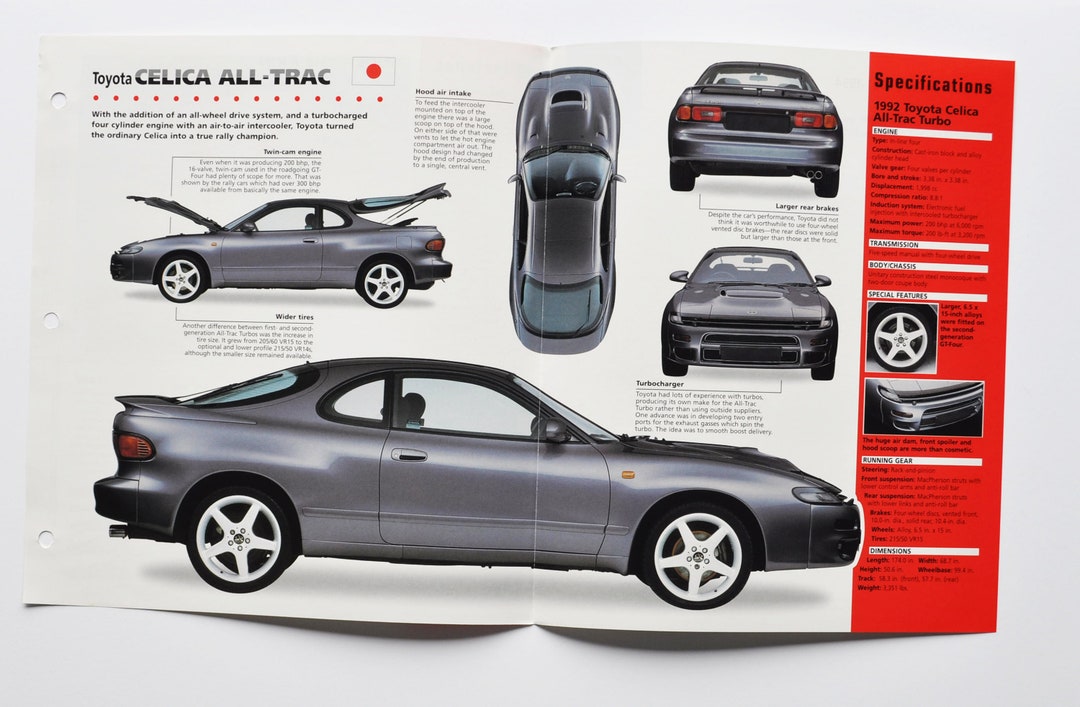
The Toyota Celica boasts seven distinct generations spanning from 1970 to 2006. With rear-wheel-drive classics, Group A rally homologation legends (like the GT-Four / All-Trac), and lightweight front-wheel-drive liftbacks with high-revving 2ZZ-GE engines, the Celica family tree is rich with technical nuance. A standard flyer often fails to capture these details cleanly.
Standard international A4 dimensions (210 × 297 mm) offer the ideal aspect ratio for vertical split-column wiki layouts. At print resolution (300 DPI, or 2480 × 3508 pixels), an A4 sheet fits comfortably into standard document sleeves, acrylic display stands, or glovebox manuals without cramping text or shrinking detailed engine bay diagrams.
Core Elements of an Editable Toyota Celica Wiki A4 Page
To replicate the authentic wiki aesthetic while highlighting what makes your specific build special, your editable layout should balance neutral encyclopedic history with vehicle-specific stats.
1. The Wikipedia-Style Infobox (Right Column or Header)
The infobox is the visual anchor. It gives onlookers quick-glance technical data. Ensure your template contains editable fields for:
- Production & Model Year: (e.g., 1994 Celica GT-Four ST205)
- Chassis Code: (e.g., TA22, RA28, ST165, ST185, ST205, ZZT231)
- Engine Configuration: (e.g., 2.0L 3S-GTE Twin-Entry Turbo, 1.8L 2ZZ-GE VVTL-i)
- Transmission: (e.g., E154F 5-speed manual with viscous coupling center diff)
- Drivetrain: RWD, FWD, or Full-Time AWD
- Kerb Weight: Standard curb weight vs. current lightened or modified weight
2. The Hero Photo & Caption
Place a clean 3/4 front angle photo of your Celica at the top of your infobox or directly below the main heading. Use an authentic wiki-style caption: include the year, paint code (such as Super White II 040 or Baltic Blue Metallic 752), and location taken.
3. Main Article Text Columns
Divide the lower portion of the sheet into two equal columns or a wide body column alongside the infobox. Include standard subheaders:
- Overview: A short paragraph summarizing the model's release and market significance.
- Chassis History & Provenance: Where your specific car was originally delivered, previous owners, or import documentation.
- Modifications / Restoration Log: Bullet points grouped by Engine, Suspension, Wheels & Tires, and Interior.
Key Specifications to Include by Generation
When customizing your editable page, ensure your historical data matches the accurate generation of your Celica. Here is a quick reference guide to verify your template's baseline stats:

First Generation (1970–1977 | A20 / A30 Series)
Known as Japan's pony car, the first-gen Celica featured distinctive Coke-bottle styling. Key details to note on your spec page include the early slant-nose versus late flat-nose revision, the introduction of the Liftback (RA28/RA29) in 1973, and engines ranging from the dual-carb 2T-G to the US-spec 20R.
Fourth & Fifth Generations (1985–1993 | T160 & T180)
This era transformed the Celica into a rally titan. If your A4 page features an ST165 or ST185, emphasize the 3S-GTE engine, water-to-air or air-to-air intercoolers, and limited-edition badges like the 1992 Carlos Sainz / RC edition (only 5,000 units produced worldwide).
Sixth Generation (1993–1999 | T200 Series)
Notable for its distinctive four-round projector headlights and Super Strut suspension. If highlighting an ST205, make sure your page notes the aluminum hood, twin-scroll turbocharger, anti-lag plumbing (plugs), and high-rise rear spoiler riser blocks.
Seventh Generation (1999–2006 | T230 Series)
Designed with "New Edge" styling by Calty Design Research. Core highlights include the Yamaha-co-developed 2ZZ-GE engine, a 8,200 RPM redline with high-lift cam engagement at 6,200 RPM, and optional factory Action Package aerodynamics.
Step-by-Step: Setting Up Your Editable A4 Page
- Choose Your Software: For pixel-perfect typography, open a document in software like Canva, Adobe InDesign, Affinity Publisher, or Microsoft Word/Google Docs.
- Set Page Boundaries: Set the document canvas to exactly 210 × 297 mm. Set outer margins between 10 mm and 12.7 mm (0.5 inches) so modern home printers do not clip text.
- Apply Wikipedia Typographic Rules: Use a neutral sans-serif or serif combination. For a modern online wiki look, use Linux Libertine or Georgia for main headers, and clean Helvetica, Arial, or Liberation Sans for body text and data tables.
- Build the Infobox Grid: Draw a thin bordered box (1px light gray, #a2a9b1) on the right side spanning roughly 35% of the page width. Set section header cells with a soft gray or light blue background (#eaecf0).
- Export Correctly: Once customized, export your file as a Print-Ready PDF (CMYK, 300 DPI) with embedded fonts. This prevents the layout from shifting if transferred to another device or sent to a local print shop.
Practical Tips for Displaying Your A4 Spec Sheet
Once printed, how you present the page matters just as much as what is written on it. Consider these methods depending on your setting:
- At Car Shows: Slip the A4 sheet into a weighted, anti-glare acrylic slanted stand. Place it on your radiator support, windshield cowl, or a folding stand next to your front wheel.
- For Sale Listings: Include high-resolution digital screenshots of your wiki sheet in online classifieds (e.g., Bring a Trailer, Cars & Bids). It acts as an instant executive summary that saves serious buyers from asking repetitive questions.
- Vehicle Binder: Use archival-quality polypropylene sleeves inside a leather ring binder alongside dyno sheets, restoration invoices, and alignment readouts.
An editable A4 wiki page elevates your Toyota Celica beyond a standard used car. By taking the time to compile clean specs, factory codes, and build milestones into an organized, readable layout, you preserve both your vehicle's personal story and its place in Japanese automotive history.