Free Hack to Mastering Nine Female Figure Types
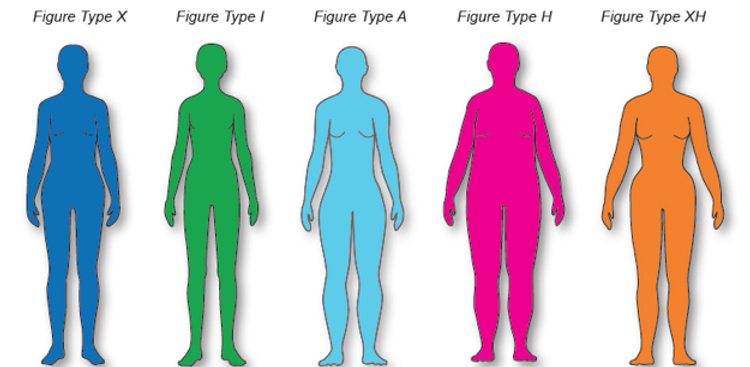
Most traditional styling systems divide the female body into four or five generic shapes: hourglass, pear, apple, and rectangle. Real bodies, however, rarely conform to such rigid templates. Modern fashion anthropology recognizes at least nine distinct silhouettes that account for variations in high-hip placement, shoulder slope, and torso proportion. Learning how to identify and dress these silhouettes does not require expensive image consultants or 3D body scanners. By applying a free hack to mastering nine female figure types, you can decode structural anatomy with a basic measuring tape or a smartphone photo grid.

The Limitations of Outdated Body Typing Systems
The standard four-category framework fails because it focuses almost entirely on circumference rather than bone structure and visual weight. For example, two women can share identical 36-28-38 measurements, yet one presents as a classic hourglass with a defined ribcage, while the other presents as a spoon shape with a high shelf-hip and a long waist.
When you dress strictly according to circumferences, you overlook visual pivot points: the collarbones, the natural waist, the high hip, and the low hip. Recognizing the nine precise silhouettes eliminates fit frustrations, prevents fabric bunching, and streamlines your wardrobe choices.
The Nine Female Figure Types Defined
To dress intentionally, you must first recognize the structural differences among the nine primary female silhouettes.
1. Classic Hourglass
The bust and hips are nearly identical in width, accompanied by a dramatically defined waist that measures at least 25% smaller than the bust and hip circumferences. Weight is distributed evenly between upper and lower halves.
2. Top Hourglass
This shape retains the sharply defined waist of the classic hourglass, but the bust measurement and shoulder line are visibly wider than the hips. Weight gain typically appears first in the upper torso and arms.
3. Bottom Hourglass
Like the top hourglass, the waist remains distinctly defined, but the hip measurement is slightly wider than the bust. The transition from waist to hip curve is smooth and proportional.
4. Rectangle (Column)
The shoulders, bust, waist, and hips align along a continuous vertical plane. The waist has minimal inward curve (typically less than a 20% reduction relative to the bust and hips), giving the silhouette an athletic, linear appearance.
5. Spoon
Often confused with the pear shape, the spoon silhouette features a distinct shelf-like hip structure. The bust and shoulders are narrower than the hips, the waist is well defined, but there is a prominent high-hip curve (shelf) where visual weight sits before tapering down toward the thighs.
6. True Pear (Triangle)
The shoulders and chest are noticeably narrower than the hips and thighs. Unlike the spoon shape, the hip line curves gradually from a slender waist down through the lower hips and upper thighs without a sharp high-hip shelf.
7. Inverted Triangle
Broad shoulders and a dominant bust taper down toward narrow hips and flatter glutes. The ribcage is typically wide, while the legs are visually dominant and slender relative to the upper frame.
8. Round (Oval / Apple)
Visual weight is concentrated through the chest and midsection, with little to no waist definition. The limbs—particularly the calves, ankles, and forearms—are comparatively lean and shapely.
9. Diamond
The diamond silhouette features narrow shoulders and relatively narrow lower legs, with the widest point of the torso resting between the lower stomach, waist, and upper hips. The bust is smaller or moderate compared to the mid-torso.

The Free Hack to Mastering Nine Female Figure Types
Professional stylists often charge hundreds of dollars for silhouette analyses. You can replicate this process at home using a zero-cost visual calibration technique known as the Two-Photo Alignment Grid.
Step 1: Set Up the Camera Angle
Do not use a selfie mirror angle; mirrors introduce tilt distortions. Instead:
- Prop your smartphone at exact waist height (roughly navel level) using a shelf or bookstack.
- Stand 8 to 10 feet away in fitted, contrast-color activewear or swimwear.
- Ensure lighting is behind the camera to prevent shadows from obscuring your outline.
Step 2: Capture Neutral and Silhouette Photos
Take two timer photos:
- Direct front view: Feet shoulder-width apart, arms resting slightly away from the torso to expose the waistline.
- Profile view: Standing naturally with posture relaxed, not hyper-corrected.
Step 3: Apply the Grid Overlay
Open your front-facing photo in your phone's default markup tool. Draw four horizontal horizontal lines using the markup ruler:
- Line A (Acromion Line): From shoulder point to shoulder point.
- Line B (Apex Line): Across the fullest part of the bust.
- Line C (True Waist Line): At the narrowest point of the torso (above the navel, below the ribcage).
- Line D (High Hip Line): Across the top of the iliac crest (the hip bone).
- Line E (Low Hip Line): Across the widest point of the buttocks and thighs.
Step 4: Decode the Result
By comparing the horizontal lengths of Line A, Line C, Line D, and Line E, your category becomes clear:
- If Line D creates a sharp horizontal spike compared to Line C, you are a Spoon.
- If Line A is significantly wider than Line E, you are an Inverted Triangle.
- If Line C is barely shorter than Lines A and E, you are a Rectangle.
- If Line C is at least a quarter shorter than A and E, evaluate whether A or E is wider to determine if you are a Classic, Top, or Bottom Hourglass.
- If Lines C and D extend beyond Line A and Line E, you fit into the Round or Diamond profile.
Tailored Dressing Rules by Silhouette Group
Once you understand your specific category, dressing becomes an exercise in visual balance rather than trial and error.
Torso-Dominant Silhouettes (Inverted Triangle, Round)
The goal is to soften the upper body line and draw attention downward toward the limbs.
- Necklines: Deep V-necks, scoop necks, and vertical lapels draw the eye down. Avoid boat necks and heavy shoulder pads.
- Bottoms: Wide-leg trousers, cargo pants with pockets, and pleated A-line skirts balance upper body volume.
- Fabrics: Fluid silks, jerseys, and unconstructed wools prevent bulk around the shoulders and chest.
Hip-Dominant Silhouettes (Pear, Spoon)
The goal is to create horizontal emphasis across the clavicles while softening transitions across the hips.
- Necklines: Bateau (boat neck), off-the-shoulder, and square cuts broaden the upper frame.
- Tops: Structured sleeves, puff shoulders, and breast pockets add visual weight where needed.
- Bottoms: Clean-front, straight-leg, or gentle bootcut trousers with no hip embellishments. Spoon shapes should prioritize mid-rise to high-rise styles that sit above the shelf-hip to prevent waistband roll.
Balanced-Curve Silhouettes (Classic, Top, and Bottom Hourglass)
The primary focus is waist preservation without adding artificial volume.
- Cuts: Wrap dresses, belted trenches, and fitted sheaths that preserve the natural inward waist sweep.
- Pants: High-waisted cuts made with stretch-woven fabrics that contour the waist-to-hip ratio without gaping.
- Warnings: Boxy, shapeless shifts obscure natural symmetry and make the torso appear heavy.
Linear and Centered Silhouettes (Rectangle, Diamond)
The objective is to introduce visual architecture and dimensional interest.
- For Rectangles: Use diagonal color blocking, belts, asymmetric hems, and peplums to break up vertical planes.
- For Diamonds: Emphasize lean shoulders and legs. Choose tunic tops with deep V-necks paired with slim-cut ankle pants, and jackets left open to form vertical lengthening lines down the center of the body.
Curating a Functional Capsule Wardrobe
Mastering your silhouette does not mean discarding your current closet. Instead, use your silhouette analysis to evaluate how current garments interact with your natural framework:
- Identify tailoring fixes: Minor adjustments—such as taking in a waistband, tapering a trouser leg, or shortening a hem—can instantly transform an unflattering garment into a custom fit.
- Stop purchasing the wrong silhouettes: When shopping online, focus on garment sketches and structural seams rather than how pieces look on styled models.
- Prioritize fabric weight: Heavy, stiff fabrics add volume; draping, bias-cut textiles contour without adding bulk.
By leveraging this objective mapping method, you can build a personal style rooted in balance and confidence, avoiding generic fashion advice that never truly fit your frame.