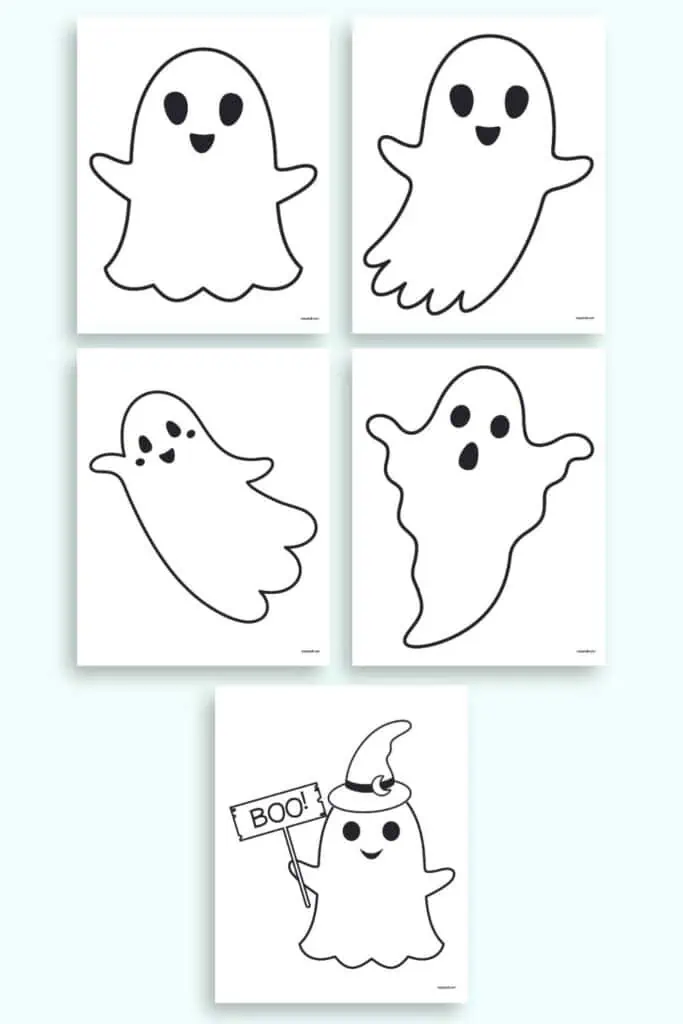
Ghostly Decor Made Simple with Cut Out Templates
When autumn leaves start to fall and a chill creeps into the evening air, transforming your living space into a haunted haven becomes one of the season's best rituals. If you want to elevate your seasonal aesthetic without spending a fortune on flimsy plastic props, papercraft is your best friend. Achieving stylish, spooky interiors is entirely possible and ghostly decor made simple with cut out templates allows anyone to craft professional-looking haunted displays in minutes.

Whether you are preparing for a neighborhood Halloween bash or simply want to add a touch of gothic whimsy to your mantel, using reliable templates takes the guesswork out of crafting. No fine-art drawing skills are required—just print, trace, cut, and display.
Why Use Templates for Halloween Crafts?
Hand-drawing dozens of floating phantoms can quickly lead to uneven shapes, hand cramps, and wasted paper. Templates solve these frustrations by providing clean, symmetrical, and well-proportioned designs every single time.
Using pre-made patterns also allows you to scale your decorations. You can easily resize digital templates on your home printer to create tiny floating specters for a tablescape or oversized wall-crawlers that dominate your entryway. It is a budget-friendly approach that yields surprisingly high-end results, especially when paired with the right paper stocks and lighting.
Essential Supplies to Gather First
Before you start printing your ghostly shapes, assemble a small toolkit to make the cutting process smooth and precise. Having the right tools prevents ragged edges and speeds up your crafting session.
- Paper Selection: Standard printer paper works in a pinch, but heavy cardstock (65lb to 110lb) ensures your ghosts hold their shape and resist curling.
- Cutting Tools: A sharp pair of detail scissors for curves, and a craft knife (like an X-Acto) with a self-healing cutting mat for intricate interior cutouts like eyes and mouths.
- Transfer Medium: A pencil for tracing templates onto thicker or patterned cardstock.
- Adhesives: Removable mounting putty, double-sided tape, or clear fishing line depending on how you plan to hang your creations.
Ghostly Decor Made Simple with Cut Out Templates: Step-by-Step
Creating your own gallery of hovering spirits requires just a few straightforward steps. Follow this method to ensure crisp, clean cutouts that look fantastic from any angle.
- Find or Design Your Templates: Search online for free silhouette shapes or draw your own ghost outlines on scrap paper. Look for a mix of classic rounded ghosts, swooping shapes, and quirky expressions.
- Print and Cut the Master: Print your chosen designs. Carefully cut out the outer perimeter of the paper template. If your template has interior features, use a craft knife to punch them out.
- Trace onto Final Material: Lay your master template over your chosen cardstock—try classic stark white, aged parchment paper, or even black paper for dramatic negative-space silhouettes. Trace lightly with a pencil.
- Cut in Batches: Stack two or three sheets of cardstock together and staple them outside the pencil line to prevent slipping. Cut through all layers at once to save time.
- Shape and Dimension: Gently bend the edges of your paper ghosts forward or backward to give them a 3D, wind-blown effect before hanging.
Creative Display Ideas for Your Paper Phantoms
Video: DIY Halloween Decor 🎃 | Easy Paper Garland Ideas 👻 | Ghosts, Bats & Pumpkins Craft

Once your cutouts are ready, the real fun begins. Where and how you place your ghosts can turn a simple craft project into an immersive seasonal display.
The Floating Window Illusion
Tape your cut-out ghosts directly to the interior glass of your front-facing windows using clear tape. When interior lights are on at night, passersby will see an entire family of friendly spirits haunting your panes. For an extra eerie glow, place battery-operated fairy lights or flickering LED tealights on the windowsill just behind the cutouts.
Hanging Chandelier Swarm
Punch a tiny hole in the top of each paper ghost and thread transparent fishing line through them. Suspend the ghosts at varying heights from a dining room chandelier or a sturdy curtain rod. Because paper is lightweight, even the subtle air currents in a room will cause the ghosts to gently sway and spin as if floating through the air.
Spooky Mantelscape Backdrop
Layer your paper cutouts across your fireplace mantel. Anchor larger ghosts against the wall using removable putty, and let smaller ones peek out from behind faux pumpkins, dried autumn branches, and old hardcover books. The contrast of matte white paper against dark fireplace brick makes the silhouettes pop instantly.
Tips for Long-Lasting Indoor Displays
While paper decorations are inherently temporary, a few minor adjustments can keep them looking fresh throughout October. If you plan to store your cutouts to reuse next year, avoid using standard scotch tape directly on the paper surface, as it can tear the cardstock when removed. Instead, opt for blue painter's tape or low-tack mounting putty. For outdoor sheltered porches, laminate your cardstock templates before hanging them to protect against unexpected autumn humidity and morning mist.
By relying on clever patterns and a bit of creativity, you can achieve sophisticated, minimalist, or playfully spooky aesthetics with minimal effort. Grab your scissors, queue up your favorite mysterious playlist, and enjoy bringing your own bespoke spectral colony to life.