How Steven Yeast Works: Sourdough Starter Guide
Whether you inherited a vigorous family heirloom culture or christened your own countertop mason jar, learning how Steven yeast functions is the foundation of baking open-crumb, deeply flavorful artisan bread. Bakers across the world frequently name their wild sourdough starters, and treating a live yeast culture like a living kitchen companion highlights an essential baking truth: natural leavening requires attentiveness, consistent nourishment, and an understanding of ambient fermentation dynamics.

Unlike commercial baker's yeast, which relies on an isolated, lab-propagated strain of fast-acting fungus, a homemade sourdough starter is a diverse ecosystem. By unpacking the biology, feeding rituals, and baking techniques behind these starters, you can take complete control of your dough's rise, flavor profile, and crumb structure.
The Biology Behind a Named Starter
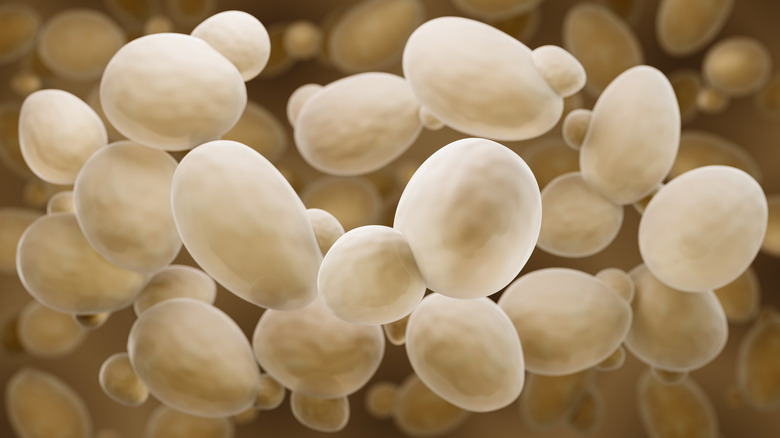
A countertop starter named Steven is not simply a jar of flour and water; it is a stable, symbiotic culture of wild yeasts and lactic acid bacteria (LAB). When flour is mixed with water, microscopic organisms naturally present on the grain's husk and in your kitchen environment awaken from dormancy.
The primary wild yeast strains found in healthy starters typically include Candida humilis, Kazachstania exigua, or wild varieties of Saccharomyces cerevisiae. Unlike commercial yeast (Saccharomyces cerevisiae selected solely for rapid gas output), wild yeasts tolerate high-acid environments. They share their habitat with friendly bacteria, most notably Lactobacillus sanfranciscensis and Lactobacillus plantarum.
These organisms survive in a mutually beneficial relationship:
- The Bacteria: Consume simpler carbohydrates produced by enzymatic breakdown, releasing lactic and acetic acids. These acids lower the culture's pH (usually between 3.8 and 4.2), creating a protective barrier that prevents mold, spoilage organisms, and pathogenic bacteria from taking over.
- The Wild Yeast: Feeds on sugars that the bacteria leave behind (such as maltose-sparing pathways) and metabolizes them into ethanol and carbon dioxide, which creates the bubbles that lift heavy dough.
How Steven Yeast Ferments Flour and Water
To master your bake, it helps to understand how Steven yeast processes fuel inside the dough. When you refresh your starter or mix a fresh dough, a multi-stage biochemical sequence begins immediately.
1. Enzymatic Breakdown
Flour consists mostly of complex starch molecules (amylose and amylopectin). Dry yeast cannot feed directly on intact starches. When water activates natural amylase enzymes within the grain, these enzymes chop long starch chains into fermentable simple sugars, primarily maltose and glucose.
2. Carbon Dioxide Production (The Lift)
Once sugars become available, the wild yeast begins cellular respiration and anaerobic fermentation. As the yeast cells consume sugar, they emit carbon dioxide gas ($CO_2$). Because flour contains glutenin and gliadin proteins, mixing water with flour forms a stretchable gluten mesh. This network captures the expanding bubbles of $CO_2$, causing your starter to double or triple in volume and creating the pockets inside bread dough.
3. Acidification and Conditioning (The Flavor)
Simultaneously, the lactic acid bacteria produce two types of acids:
- Lactic acid: Imparts a soft, yogurt-like, mellow creaminess.
- Acetic acid: Provides the sharp, vinegar-like punch characteristic of tangy sourdough.
Beyond creating flavor, these acids modify gluten extensibility and strengthen dough elasticity, allowing a loaf to hold its shape during final shaping and oven spring.
Daily Feeding Schedule: Maintaining Culture Health

To keep a starter active, predictable, and clean-smelling, you must establish a reliable feeding routine. Leaving a starter without fresh flour causes the yeast to exhaust its food supply, accumulate waste byproducts, and deteriorate into an acidic liquid known as hooch.
- Weigh Your Ingredients: Always use a digital kitchen scale rather than volume cups. Volume varies significantly depending on how tightly flour is packed.
- Follow a Standard Ratio: A balanced maintenance formula is a 1:1:1 ratio (by weight) of starter carryover, fresh flour, and room-temperature water. For example, retain 30 grams of active starter, add 30 grams of unbleached flour, and mix in 30 grams of water ($75^{\circ}\text{F}$ to $78^{\circ}\text{F}$ / $24^{\circ}\text{C}$ to $26^{\circ}\text{C}$).
- Choose Quality Flour: Whole rye and whole wheat contain high concentrations of natural enzymes and minerals that accelerate fermentation. For ongoing maintenance, a 50/50 blend of unbleached bread flour and whole grain flour delivers consistent, robust performance.
- Observe the Rise: After feeding, mark the jar with a rubber band. In a comfortable room ($70^{\circ}\text{F}$ to $74^{\circ}\text{F}$), your culture should peak—expanding to roughly double or triple its original volume with a domed, bubbly top—within 4 to 8 hours.
Troubleshooting Common Starter Symptoms
Because wild yeast cultures are sensitive to changes in temperature, hydration, and flour sources, you may encounter occasional issues:
Hooch on the Surface
A clear, gray, or dark amber liquid pooling on top of your starter indicates hunger. The yeast has completely metabolized its available starches and is producing alcohol byproducts. Pour off or stir in the liquid, discard down to a small base (e.g., 20 grams), and feed at a higher ratio like 1:3:3 or 1:4:4 to provide more fuel.
Sluggish or Inactive Growth
If your jar shows tiny bubbles but refuses to rise, cool ambient temperatures are usually the culprit. Wild yeasts operate best between $75^{\circ}\text{F}$ and $82^{\circ}\text{F}$ ($24^{\circ}\text{C}$–$28^{\circ}\text{C}$). Place your jar in an unlit oven with the interior light turned on, or set it near a warm appliance. Ensure your tap water does not contain high chlorine or chloramine levels, which inhibit microbial reproduction; use filtered or dechlorinated water if necessary.
Unpleasant Aromas
A thriving culture smells fruity, yeasty, and pleasantly sour (resembling green apples or fresh cider). If the starter produces an aggressive acetone or nail-polish smell, it is severely depleted of sugars. Consecutive daily feedings at room temperature quickly balance the yeast-to-acid ratio and restore clean aromas.
Putting Your Starter to Work: Baking with Natural Leaven
Once your starter consistently rises and falls on a predictable schedule, it is ready to bake bread. Here is how to transition your culture into an artisan loaf:
- Build a Levain: Several hours before mixing dough, combine a small portion of mature starter with the flour and water amounts specified by your recipe. Using a levain allows you to tailor hydration and flour types specifically for the target bread profile without disturbing your master jar.
- Use at Peak: Mix the levain into your main flour and water when it reaches its maximum height, just before the dome begins to recede. At this stage, wild yeast density is at its highest, providing maximum leavening power.
- Manage Bulk Fermentation: Sourdough moves slower than commercial dry yeast. Expect bulk fermentation to take between 3.5 and 6 hours at room temperature, accompanied by periodic stretch-and-folds to build structural gluten integrity.
- Retard Overnight: Placing shaped loaves in a refrigerator ($38^{\circ}\text{F}$ / $3^{\circ}\text{C}$) for 12 to 18 hours slows yeast gas production while allowing lactic bacteria to continue developing flavor acids, leading to blisters on the crust and deeper savoriness.
Long-Term Storage and Dormancy
You do not need to feed a wild starter daily if you bake only on weekends. Once your culture is fully established and mature (typically after 3 to 4 weeks of consistent activity), you can store it in the refrigerator with a loose lid.
Feed it thoroughly, let it sit at room temperature for one hour so the microorganisms begin feeding, and then place it in the fridge. In this chilled state, yeast metabolism slows dramatically. A single feeding every 7 to 10 days keeps the culture vigorous. When you are ready to bake, pull it out, perform one or two room-temperature refreshes, and proceed with your recipe.
By understanding the biological balance that makes wild yeast cultures tick, you transform simple flour and tap water into an enduring, reliable leavening engine capable of producing artisan bread for decades to come.