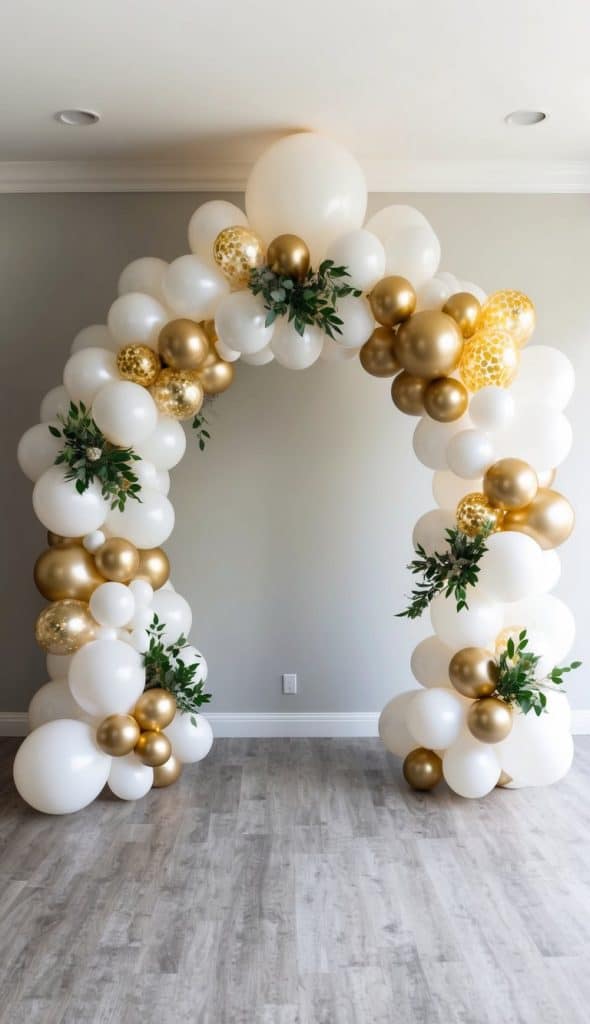
How to Create a Stunning DIY White Balloon Arch
Few party decorations make as striking an impact as a well-designed white balloon arch. Whether you are planning an elegant wedding reception, a minimalist birthday party, a sophisticated bridal shower, or a gender-neutral baby shower, white balloons offer a timeless, clean aesthetic that instantly elevates any venue. While hiring a professional event stylist can be costly, assembling your own organic balloon installation is surprisingly affordable and deeply satisfying.
In this guide, we will walk you through everything you need to know to plan, build, and secure a professional-looking balloon display that will leave your guests in awe.
Choosing the Right Materials
Before you begin blowing up balloons, gathering the correct supplies is essential for structural stability and visual appeal. Skimping on materials often leads to drooping arches or balloons popping prematurely.
Essential Supplies Checklist
- A Variety of Balloon Sizes: Purchase a mix of 5-inch, 10-inch, 12-inch, and 18-inch latex balloons. Varying sizes are the secret to achieving that lush, professional look rather than a stiff, uniform appearance.
- Color Palette: While pure white is a classic choice, consider mixing matte white, pearl white, and even clear balloons filled with white confetti or double-stuffed balloons (putting a white balloon inside a black or dark balloon to make it completely opaque and matte).
- Balloon Strip or Fishing Line: Plastic decorating strip with holes makes spacing easy for beginners, while clear fishing line offers ultimate flexibility for organic shapes.
- Electric Balloon Pump: Blowing up 100+ balloons by mouth is exhausting. An electric air pump will save your lungs and cut your prep time in half.
- Low-Temp Glue Dots: Essential for filling in sparse gaps by sticking smaller balloons onto the larger base structure.
- Command Hooks or Backdrop Stand: Depending on where you are hanging your arch, you will need heavy-duty wall hooks, zip ties, or a dedicated metal arch frame.
Step-by-Step Guide to Assembling Your Arch
Creating a beautiful installation comes down to preparation and layering. Follow these steps to ensure a stress-free assembly process on the day of your event.
1. Inflate and Cluster Your Balloons
Blow up your balloons using the electric pump. Do not inflate them to maximum capacity; leaving them slightly under-inflated makes them rounder, less prone to popping in the heat, and much easier to tie together. Tie balloons of varying sizes into pairs, then twist two pairs together to create "clusters" or quads.
2. Attach to Your Base

If you are using a plastic balloon strip, pull the tied knot of each balloon cluster through the holes on the strip, alternating sizes as you go. If you are using fishing line, tie the line securely around the neck of a balloon cluster and wrap the line tightly around subsequent clusters in a figure-eight motion.
3. Shape and Mount the Structure
Once your base chain is full, it is time to mount it. If you are using a metal arch frame, wrap the structure with your balloon chain, securing it with zip ties at regular intervals. If mounting to a wall, use damage-free heavy-duty hooks and secure the fishing line tightly so the weight is evenly distributed.
4. Fill the Gaps
Step back and look at your creation from a distance. You will likely notice a few sparse spots where the wall or frame shows through. Use your low-temp glue dots to attach 5-inch mini balloons into these hollows. This adds depth, dimension, and a truly professional finish.
Pro Tips for Long-Lasting Success
Latex balloons are sensitive to their environment. Keep these practical tips in mind to ensure your installation looks fresh throughout the entire event:
- Avoid Direct Sunlight: UV rays cause latex to oxidize quickly, turning white balloons into a dull, chalky matte or causing them to pop rapidly from heat expansion. If your event is outdoors, place the arch in a shaded area.
- Use Balloon Shine Sparingly: If you want a glossy, polished look, spray your finished installation with a balloon shine product or furniture polish, wiping gently with a microfiber cloth.
- Build It the Day Before: Good quality latex balloons can easily last 24 to 48 hours indoors. Building your creation the day before saves you precious time on the day of the party.
Conclusion
A DIY white balloon arch is a cost-effective way to add high-end design to any celebration. By combining different balloon sizes, utilizing an electric pump, and taking your time with the styling phase, you can achieve a magazine-worthy backdrop that will serve as the perfect photo opportunity for you and your guests.