How to Fix a Vuse Pod Not Hitting: Easy Steps
Few things are more frustrating than reaching for your device only to find out your Vuse pod is not hitting. Whether you are using a Vuse Alto or another popular model in the lineup, a non-responsive vape can ruin your routine. Fortunately, most common issues—ranging from sticky condensation to poor electrical connections—are easy to troubleshoot and fix at home without buying a replacement right away.
Why Is Your Vuse Pod Not Hitting?
Before jumping into the solutions, it helps to understand why your device might be failing. Vuse e-cigarettes rely on a simple mechanism: when you inhale, an airflow sensor activates the battery, which heats the metal coil inside the pod to vaporize the e-liquid. If any part of this chain is interrupted—by debris, a dead battery, or a bad connection—the device will not produce vapor.
Common culprits include a buildup of e-liquid residue in the chamber, a discharged battery, or a defective pod from the package. Let us break down the exact steps you can take to get your device working again.
Step-by-Step Guide on How to Fix Vuse Pod Not Hitting
Follow these troubleshooting steps in order to diagnose and resolve the issue efficiently.
1. Clean the Connection Points
The most frequent cause of a Vuse pod failing to fire is a poor electrical connection between the pod and the battery. Over time, e-liquid condensation leaks into the chamber, creating a barrier that blocks the current.
- Remove the pod from the battery device.
- Take a cotton swab (Q-tip) and dip it lightly in rubbing alcohol (isopropanol). Wring out excess liquid so it is damp, not dripping.
- Wipe down the gold-plated contact pins inside the battery cavity.
- Clean the bottom metal contacts on the underside of the Vuse pod.
- Wait 2 to 3 minutes for the alcohol to completely dry before reinserting the pod.
2. Check and Clear the Airflow Path
Vuse pods require unobstructed airflow to trigger the automatic draw sensor. If the tiny airflow holes on the side of the device or the bottom of the pod are blocked, the battery will not fire.
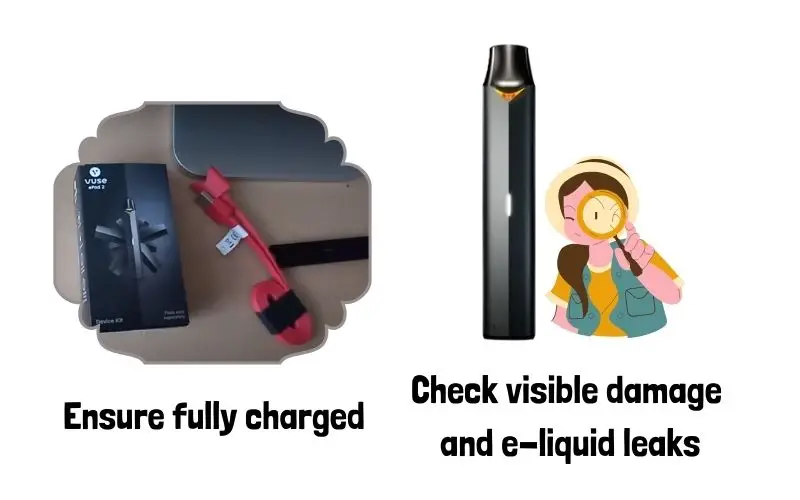
- Inspect the tiny air intake slots on the side of the Vuse battery body.
- Use a straightened paperclip, a sewing needle, or a toothpick to gently clear out any pocket lint, dust, or dried e-liquid blocking the holes.
- Take a dry cotton swab to clean the mouthpiece and the central airflow channel of the pod.
3. Inspect the Battery Charge and LED Indicator
Sometimes the issue has nothing to do with the pod itself, and your battery simply lacks the power to heat the coil.
- Connect your Vuse device to its magnetic USB charger.
- Observe the LED indicator light. If it flashes a specific color (usually red or white depending on the model), it indicates a charging or connection error.
- If the light does not turn on at all, try plugging the charger into a different USB port or using a different wall adapter.
- Allow the device to charge for at least 30 minutes before testing it again.
4. Adjust the Pod Placement
A loose pod will not maintain the steady connection required to complete the electrical circuit.
- Remove the pod, rotate it 180 degrees, and click it back into the battery. Vuse pods are designed to fit either way, but changing the orientation can help reset the connection.
- Press down firmly until you feel or hear a secure click, ensuring the pod sits flush inside the housing.
- Try taking a gentle puff without inhaling too aggressively, as over-pulling can flood the coil.
5. Try a Different Pod
Quality control issues can occasionally result in a dud pod with a broken internal heating element or a severed wire. To test this:
- Take a fresh, unused Vuse pod out of its packaging.
- Insert it into your current battery device.
- If the new pod hits immediately, your previous pod was defective. You can safely discard the old one. If the new pod also fails to hit, the problem lies within the battery device itself.
How to Prevent Future Vuse Pod Issues
Proper maintenance can extend the lifespan of your device and prevent future frustrations. Implement these quick habits to keep your Vuse running smoothly:
- Clean weekly: Wipe out the battery cavity with a dry cotton swab once a week to prevent sticky buildup.
- Store properly: Keep your vape at room temperature. Extreme heat can thin the e-liquid and cause excessive leaking, while extreme cold can thicken the liquid and block the coil.
- Avoid over-charging: Unplug your device once the LED indicator shows a full charge to preserve battery health.
When to Replace Your Vuse Battery
Li-ion batteries degrade over time. If you have tried cleaning the contacts, clearing the airflow, and testing multiple pods, but the device still refuses to hit or hold a charge, the internal battery has likely reached the end of its lifespan. Vuse batteries are relatively inexpensive to replace at local convenience stores or vape shops.