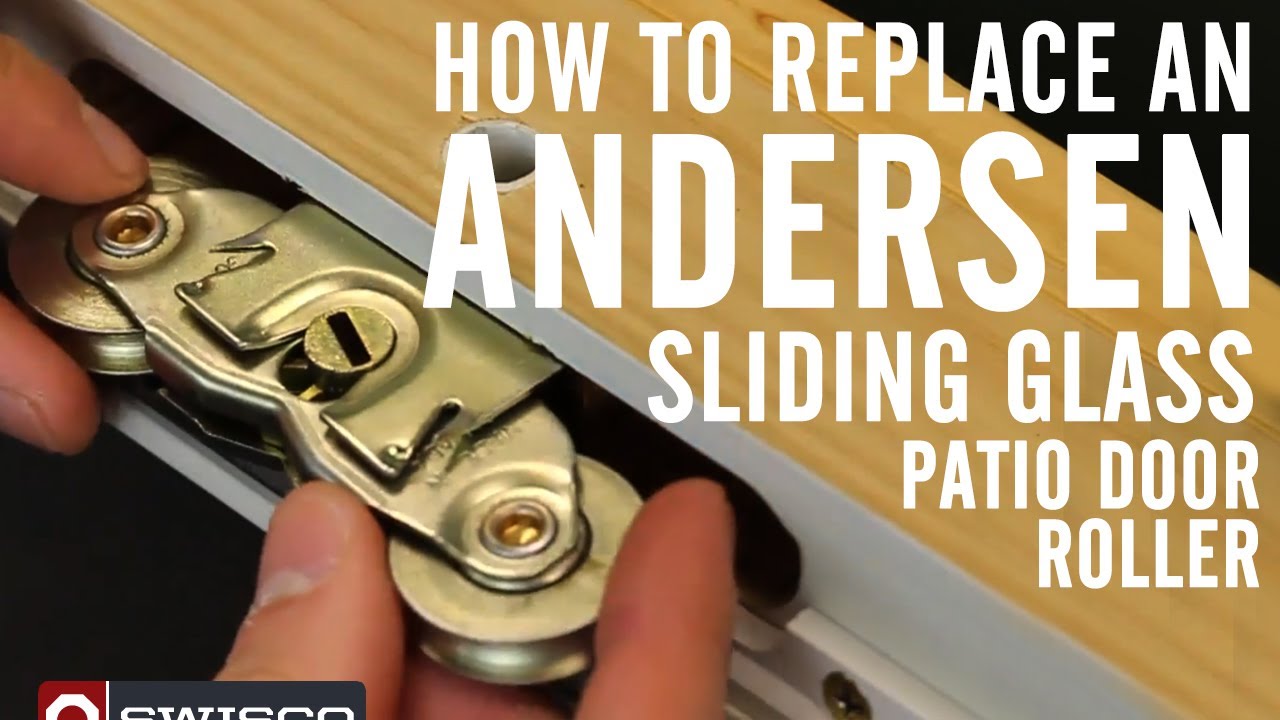
How to Fix and Replace Patio Door Rollers
How to Fix and Replace Patio Door Rollers

Few household frustrations match the annoyance of a sliding glass door that refuses to glide. Instead of a smooth, one-finger motion, opening the door requires a full-body tug accompanied by a teeth-grinding screech. In most cases, the culprit behind this daily headache is worn-out or dirty patio door rollers. Over time, dust, hair, pet dander, and heavy use take a severe toll on the tiny wheels hidden at the bottom of the door frame. Fortunately, replacing these components is a manageable DIY project that can save you the cost of hiring a professional.
Diagnosing the Problem
Before you run out to buy replacement parts, you need to confirm that the rollers are actually the issue. Sometimes a door is merely out of alignment or riding on a track packed with debris.
Check the Track and Alignment
Start by thoroughly cleaning the bottom track using a vacuum and a stiff brush with warm, soapy water. Once the track is spotless, examine how the door sits in the frame. If the gap between the door and the jamb is wider at the top than the bottom, the door has dropped out of alignment. Most patio doors feature adjustment screws located near the bottom corners on the inside face. Turning these screws clockwise raises the door, while counter-clockwise lowers it.
Signs of Failed Rollers
If adjusting the height does not fix the scraping or rolling resistance, the rollers themselves are likely damaged. Common signs include:
- Flat spots on the wheels from prolonged weight and lack of movement.
- Cracked or completely fractured nylon or steel wheels.
- Seized bearings that cause the wheels to drag rather than roll along the track.
Tools and Materials Needed
Gathering your supplies beforehand makes the repair process go much faster. You will need:
- A putty knife or screwdriver to remove cover caps.
- A Phillips or flathead screwdriver (depending on your door model).
- A pry bar or stiff putty knife (for lifting the heavy door panel).
- A helper (sliding glass door panels are surprisingly heavy).
- A vacuum cleaner and cleaning supplies for the track.
- New patio door rollers matched to your exact door brand and weight rating.
Step-by-Step Replacement Guide
Replacing patio door rollers requires removing the moving panel from the frame. Take your time and protect your flooring with old blankets or cardboard before you begin.
Step 1: Adjust the Door to its Lowest Position
Video: How to Replace the ROLLERS on a Sliding Glass Patio Door

Locate the adjustment access holes on the bottom edges of the sliding panel. Insert your screwdriver and turn the screws counter-clockwise to lower the door as far as possible. This retracts the rollers up into the frame and creates enough clearance at the top of the door to lift it out.
Step 2: Remove the Sliding Panel
Have your helper ready. Carefully push the top of the door panel up into the upper track while tilting the bottom of the door toward you. Once the bottom rollers clear the lower track, lower the panel out of the frame entirely. Lift it straight out and set it gently on a padded surface, resting it on its edge rather than flat on the glass.
Step 3: Extract the Old Rollers
Look at the bottom edge of the door panel where the wheels are housed. You will typically see a mounting screw holding the roller assembly in place. Remove this screw. In some older aluminum doors, the roller is held in by friction or a spring clip; you may need to gently tap it out using a screwdriver and a hammer. Slide or pull the old assembly out of the bottom channel.
Step 4: Source the Correct Replacements
Matching your old patio door rollers is the most critical step. Take the old assembly to a local hardware store or search online using the manufacturer's name if known. Pay close attention to:
- The wheel material (nylon, steel, or ball-bearing steel).
- The width and diameter of the wheel.
- The housing shape and mounting screw placement.
Step 5: Install the New Rollers
Slide the new roller assembly into the bottom channel of the door. Secure it with the mounting screw, ensuring it sits flush and straight inside the frame. Repeat the process for the roller on the opposite side of the door panel.
Step 6: Reinstall and Adjust the Door
With your helper, lift the door panel back into the opening. Insert the top of the door into the upper track first, then swing the bottom inward and down onto the lower track. Adjust the height screws on both sides until the door rolls smoothly and seals evenly against the vertical frame when closed. A properly adjusted door should glide effortlessly with a gentle push from a single finger.
Maintenance Tips to Extend Roller Lifespan
Once you have restored your sliding door, regular maintenance will keep it working like new for years to come. Vacuum the bottom track at least once a month to prevent grit from grinding into the new wheels. Avoid using heavy, sticky grease or oil lubricants on the track, as these attract dust and pet hair, forming a gummy paste that seizes the wheels. Instead, use a dry silicone spray or a light PTFE-based lubricant specifically designed for sliding door tracks.