How to Install iCUE: Complete Step-by-Step Guide
Corsair's iCUE (Corsair Utility Engine) software is the central command hub for your gaming setup. Whether you are synchronizing dazzling RGB lighting across your fans and keyboard, monitoring CPU temperatures, or programming complex macro keys on your mouse, getting the software running correctly is essential. If you are ready to set up your ecosystem, knowing the proper way to download and install iCUE ensures you avoid common conflicts, missing device detections, and performance hiccups.

System Requirements and Preparation
Before you begin the installation process, it is important to ensure your operating system and hardware meet the baseline requirements. iCUE is a robust software suite that runs background services to monitor hardware telemetry and control lighting profiles in real-time.
- Operating System: Windows 10 or Windows 11 (64-bit). Older versions of Windows are no longer officially supported by modern iCUE versions.
- Storage Space: At least 1.5 GB of free space on your primary drive (SSD recommended for faster launch times).
- Internet Connection: Required for downloading the installation package and checking for firmware updates.
To prevent conflicts during setup, close any unnecessary background applications, especially other RGB control software like MSI Mystic Light, ASUS Armoury Crate, or Razer Synapse, as third-party clashes often prevent devices from appearing in iCUE.
How to Download and Install iCUE
Installing Corsair iCUE is a straightforward process, but following the correct sequence helps guarantee that your connected hardware is recognized right out of the gate.
- Visit the Official Website: Go to the official Corsair website and navigate to the iCUE download page. Avoid third-party mirror sites to ensure you receive the safest, most up-to-date installer file.
- Select the Right Version: Download the installer package tailored for your operating system (typically iCUE for Windows 10/11).
- Run the Installer: Locate the downloaded `.exe` file in your Downloads folder. Right-click the file and select "Run as administrator" to ensure the installer has the necessary permissions to create registry entries and background services.
- Follow the Setup Wizard: Accept the terms of the license agreement and choose your preferred installation directory. For most users, leaving the destination folder at the default path is ideal.
- Complete and Restart: Click Install and wait for the progress bar to finish. Once complete, it is highly recommended to restart your computer so that all background drivers and modules can initialize correctly.
Post-Installation Setup and Device Detection
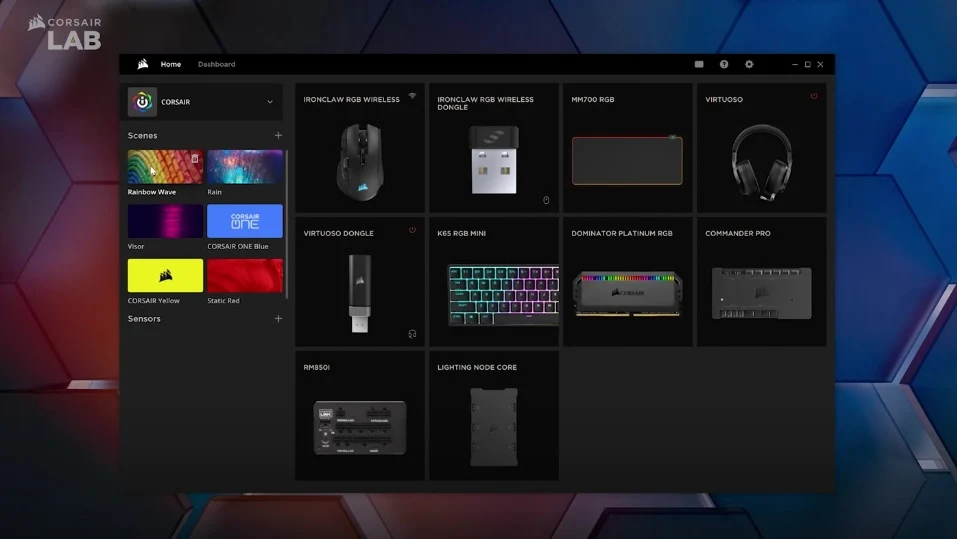
Once your system reboots, launch iCUE from your desktop shortcut or system tray. When the dashboard opens, you should immediately see your connected Corsair devices—such as keyboards, mice, AIO liquid coolers, and RAM modules—displayed as tiles on the home screen.
Updating Firmware
Upon initial setup, iCUE will often notify you if your hardware requires a firmware update. It is vital to let these updates run:
- Keep your PC plugged into a stable power source (especially laptops).
- Do not disconnect any USB devices or restart your computer while a firmware flash is in progress.
- Once updated, your hardware will save the configuration profile directly to its onboard memory.
Configuring Profiles and Lighting

With your devices recognized, you can begin tailoring the software to your preferences. Create custom hardware lighting profiles that remain active even when the software is closed, or use software-based murals to create immersive lighting waves across your entire desktop setup.
Troubleshooting Common Installation Issues
Even with a clean download, users occasionally run into snags. If your devices fail to show up or the installer freezes, try these troubleshooting steps:
1. Clear Previous Installations
Leftover files from older versions of Corsair Link or iCUE can corrupt a new installation. Use Windows Apps & Features to uninstall the program, then use a tool like Revo Uninstaller or manually delete leftover folders in your AppData and ProgramData directories before reinstalling.
2. Run as Administrator
If the installer fails to launch or throws a permission error, make sure you are logged into an administrator account and explicitly select "Run as administrator" when executing the setup file.
3. Check Windows Services
iCUE relies on specific background services to communicate with USB controllers. Press Win + R, type services.msc, and ensure that Corsair-related services are set to run automatically.
Conclusion
Successfully setting up your gaming peripherals comes down to getting the software right. By following these steps to download and install iCUE cleanly, you unlock the full potential of your Corsair hardware—from advanced macro programming to synchronized lighting ecosystems. Keep your software and firmware up to date to ensure peak performance and stability for years to come.