How to Replace Belt on Troy-Bilt Self-Propelled Mower
When your walk-behind mower suddenly stops pulling forward, slips on slight inclines, or gives off a burnt-rubber smell, the drive belt is almost always the culprit. Learning how to replace belt on Troy-Bilt self-propelled mower decks is a straightforward DIY repair that saves you the cost of a shop service fee and prevents weeks of downtime during peak mowing season.
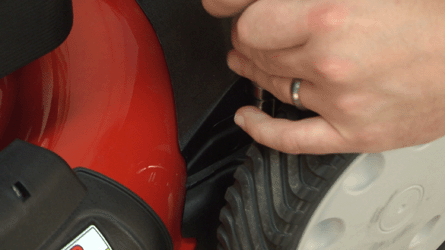
Whether you have a front-wheel-drive (FWD) model like the TB200 or TB210, or a rear-wheel-drive (RWD) unit like the TB230 or TB330, the core replacement process follows the same mechanical principles. With a few basic hand tools and about 45 minutes, you can have your machine pulling smoothly again.
Tools and Supplies You Will Need
Before turning a single bolt, gather everything required for the repair:
- Replacement drive belt: Check your mower’s parts manual for the OEM part number (common Troy-Bilt belts include 954-04282, 754-04282, 954-0637A, and 954-04208).
- Socket set and ratchet: Typically 3/8-inch, 1/2-inch, 9/16-inch, or 10mm/14mm sockets depending on the year of manufacture.
- Torque wrench: To safely torque the mower blade bolt upon reassembly (typically 38–50 ft-lbs).
- Heavy leather work gloves: Essential for handling the mower blade.
- Wood block (2x4): To wedge between the blade and deck to stop rotation while loosening bolts.
- Putty knife or wire brush: To scrape away packed grass clippings from the underside of the deck and around pulleys.
Crucial Safety Steps Before You Begin
Working on the underside of a mower involves exposed cutting blades and direct access to the engine crankshaft. Always follow these safety protocols:
1. Disconnect the Spark Plug Boot
Pull the heavy rubber boot completely off the spark plug and tuck it away from the terminal. This eliminates any chance of the engine accidentally firing if the blade turns during service.
2. Manage the Fuel Tank
You will need to tilt the mower on its side. To keep gasoline from pouring out through the vented gas cap, run the tank dry beforehand, siphon out the fuel, or place a clean sheet of heavy plastic wrap under the gas cap before screwing it back down tightly.
3. Tilt in the Correct Direction
Always tip a walk-behind mower so the air filter and carburetor face upward, pointing toward the sky. If you tip the mower with the carburetor facing down, motor oil from the crankcase will migrate into the air filter housing, ruining the paper filter and flooding the carburetor.
Step-by-Step: How to Replace Belt on Troy-Bilt Self-Propelled Mower
Step 1: Remove the Drive Baffle or Top Belt Cover
On most Troy-Bilt front-wheel-drive mowers, the transmission sits under a plastic protective cover at the front edge of the deck. Use your ratchet or a nut driver to remove the mounting screws holding this shield in place. Lift the cover off to reveal the transmission pulley and the forward section of the belt. Clean away any impacted debris, grass, or dirt packed around the transmission housing.
Step 2: Tip the Mower and Secure the Blade
Tilt the mower onto its side with the air cleaner pointing up. Position a scrap piece of 2x4 lumber between the edge of the blade and the inner deck wall to jam the blade. This prevents the crankshaft from spinning when you break the blade bolt loose.
Step 3: Remove the Blade and Blade Adapter

Using a 5/8-inch or 14mm socket (depending on the specific model), loosen the center blade bolt by turning it counterclockwise. Remove the bolt, the curved washer (bell washer), and the cutting blade. Wear gloves throughout this step to protect your hands from sharp edges.
Directly above the blade sits the blade adapter, which connects to the engine shaft and holds the lower drive pulley. Carefully slide the blade adapter off the crankshaft. If it is stuck due to rust or grit, gently pry around its perimeter with a flathead screwdriver or light pry bar. Once free, note how the belt sits inside the engine pulley groove above the adapter.
Step 4: Unhook the Worn Belt
With the blade adapter removed, you now have clearance around the engine crankshaft:
- Slip the old belt off the engine pulley.
- Guide the belt through any belt keepers (metal wire guides or tabs welded to the deck).
- Release the forward end of the belt from the transmission pulley. On some models, you may need to compress the tension idler spring slightly by hand to gain enough slack to walk the belt off the pulley groove.
Step 5: Route the New Drive Belt
Inspect the new belt to confirm it matches the length and width of the old one before installing it. Follow the reverse routing path:
- Thread the belt down through the deck opening toward the front or rear transmission.
- Wrap the belt around the transmission pulley, ensuring it sits squarely inside the V-groove.
- Route the belt through the stationary metal belt keepers along the underside of the deck. These retainers keep the belt aligned and prevent it from jumping off during vibration.
- Loop the opposite end around the engine drive pulley on the crankshaft.
Step 6: Reinstall the Blade Adapter and Cutting Blade
Slide the blade adapter back onto the engine crankshaft, making sure the keyway or internal splines align correctly with the shaft. Recheck that the belt remains seated properly inside the pulley groove above the adapter.
Position the blade onto the adapter with the raised fins (wind wings) pointing upward toward the deck. Reinstall the bell washer (cupped side facing toward the blade) and thread the center bolt by hand to avoid cross-threading. Block the blade with your wood block and tighten the bolt to manufacturer specifications—typically between 38 and 50 ft-lbs using a torque wrench.
Step 7: Reinstall Deck Shields and Reconnect
Lower the mower back to its wheels. Reinstall the plastic front or rear transmission shield and secure its mounting hardware. Remove the plastic wrap from the gas cap if you used it earlier, reconnect the spark plug boot, and push the mower by hand to confirm the wheels turn freely.
Testing and Adjusting Drive Cable Tension
After putting a new belt on your Troy-Bilt mower, the drive cable may need a minor adjustment to compensate for the firmer, unworn profile of the new rubber.
Start the mower in a clear outdoor area. Squeeze the drive bail handle against the handlebar. The mower should engage immediately and pull forward with authority. Release the bail; the mower should disengage fully and roll forward or backward with zero resistance.
- If the mower slips or hesitates under load: The cable is too loose. Locate the barrel adjuster on the drive cable along the handle, loosen the lock nut, and thread the adjuster outward to increase cable tension.
- If the mower creeps forward while the bail is released: The cable is too tight. Thread the barrel adjuster inward to give the belt more slack when disengaged.
How to Extend the Life of Your New Drive Belt
Drive belts typically last two to four seasons depending on yard size, terrain, and storage conditions. To get maximum life out of your new belt, follow these habits:
- Clear the deck housing regularly: Accumulated grass clippings hold moisture and generate friction, causing belts to glaze, crack, or slip off pulleys prematurely.
- Avoid engaging drive in tall, heavy grass: Push through dense overgrowth manually or raise the deck height to avoid putting sudden, severe friction shock on the belt.
- Store out of direct sunlight: Excessive heat and ozone accelerate rubber dry rot during the off-season.
By following these steps, you can complete the repair yourself in under an hour, restore full pulling power to your mower, and keep your lawn looking sharp all season long.


