How to Upgrade Your 3DS SD Card Easily
When Nintendo released the 3DS family of systems, digital games through the eShop quickly became a popular way to build a library. Unfortunately, the stock SD cards bundled with these systems—often just 2GB or 4GB—fill up rapidly. Whether you want to download massive titles like Monster Hunter or store dozens of indie games, upgrading your SD card 3DS storage is the best solution.
Many users worry that swapping out storage will corrupt their save files or erase their purchases. The good news is that Nintendo made the process relatively straightforward, provided you follow the correct formatting and file-transfer steps. Here is everything you need to know to upgrade your storage safely.
What You Will Need Before You Start
Before opening your console or plugging anything into your computer, gather the necessary tools. Having everything ready prevents data corruption and ensures a smooth transition.
- A new SD or microSD card: Standard 3DS systems use full-size SD cards, while the New 3DS, New 3DS XL, and 2DS XL models use microSD cards (usually inside an adapter). Check your specific console model before buying.
- Capacity limit: Officially, Nintendo supports up to 32GB SD cards formatted to FAT32. However, with a simple reformatting tool, you can use 64GB, 128GB, or even larger cards without issue.
- A computer with an SD card reader: You will need to temporarily transfer files from your old card to your new one.
- A formatting tool (for cards over 32GB): Windows and Mac built-in formatters often force exFAT for large drives, but the 3DS requires FAT32. Tools like GUIFormat (Windows) or Disk Utility (Mac) will be necessary.
Step-by-Step Guide to Upgrading SD Card 3DS Storage
The entire process takes about 15 to 30 minutes, depending on how much data you currently have on your system. Follow these steps carefully to avoid losing progress.
Step 1: Power Down and Remove the Old SD Card
Always turn off your 3DS completely before touching the storage media. Putting in or pulling out a card while the system is in sleep mode or powered on can corrupt the file system.
- Hold down the POWER button until the power-off menu appears, then select Power Off.
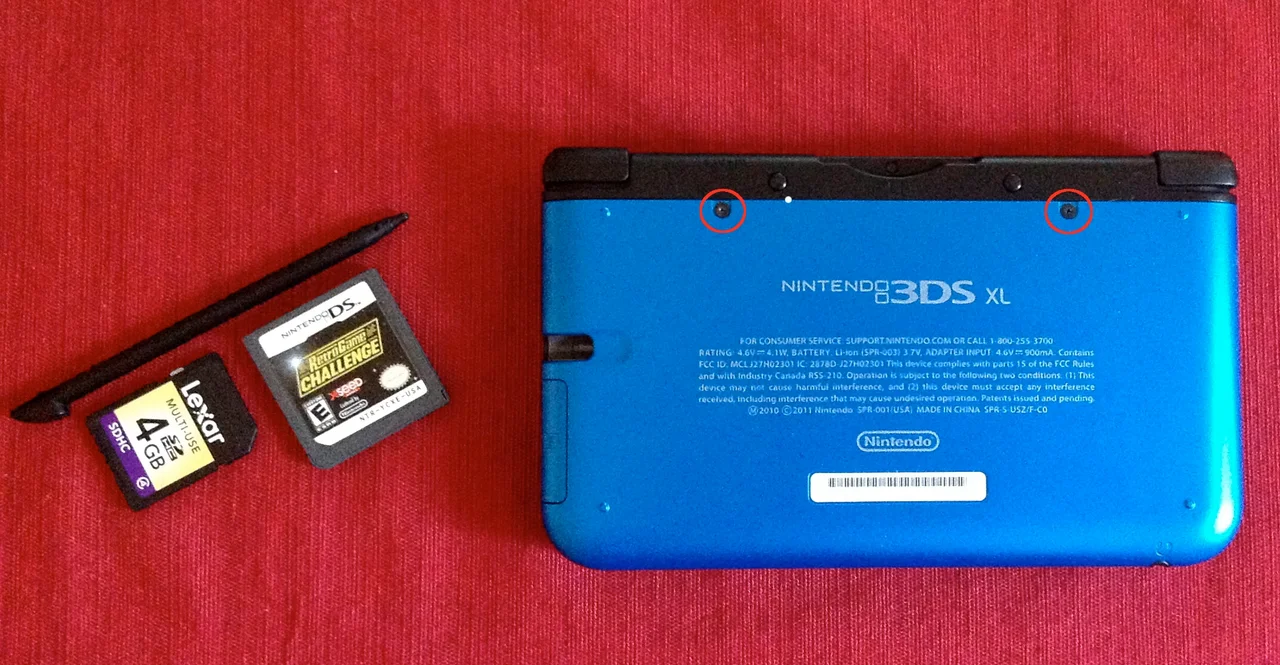
- Locate the SD card slot. On original 3DS models, it is on the right side of the console. On the 3DS XL, it is on the left edge. On New 3DS models, you must unscrew the backplate to access the microSD slot.
- Gently press the card inward until it clicks, then pull it out.
Step 2: Prepare the New SD Card
If your new SD card is 32GB or smaller, you can usually skip manual formatting and just put it straight into your computer. If it is 64GB or larger, you must format it to FAT32 with a 32KB allocation unit size.
Insert the new card into your computer. If using Windows and a card larger than 32GB, download a reputable FAT32 formatter program, select your new SD card drive letter, and run the format process. Do not use the default Windows right-click format option for large cards, as it will default to exFAT, which the 3DS cannot read.
Video: Upgrade 3DS Storage 2023 guide (Without losing games and CFW)

Step 3: Copy Your Data to the Computer
Insert your original 3DS SD card into your computer's card reader.
- Open your file explorer (File Explorer on Windows, Finder on Mac).
- Open the drive corresponding to your old SD card. You should see a folder named Nintendo 3DS.
- Copy this entire
Nintendo 3DSfolder and paste it somewhere temporary on your computer's hard drive, such as your desktop. Crucial tip: Copy the folder directly; do not open it and copy individual files, as hidden files and folder structures must remain intact.
Step 4: Transfer Data to the New SD Card
Once the copy process to your computer is complete, eject the old SD card safely and insert your newly formatted replacement card into the computer.
- Open the root directory of the new SD card.
- Paste the
Nintendo 3DSfolder that you saved on your desktop directly onto the root of the new card. - Wait for the file transfer to finish completely. Depending on how many digital games you own, this could take a few minutes.
- Once finished, use the "Safely Remove Hardware" or eject function on your computer before unplugging the card.
Step 5: Insert the New Card into Your 3DS
Take your newly prepared card and insert it into your 3DS system's card slot. Push it in until it clicks securely into place. Power on your console. If you followed all the steps correctly, all your installed games, themes, badges, and save data will appear on the home menu exactly as they did before.
Troubleshooting Common Issues
Most upgrades go off without a hitch, but minor issues can occasionally pop up due to formatting errors or hidden files.
- "No SD Card Inserted" Error: Turn off the system, remove the card, and check for dust. Reinsert it firmly until it clicks. If the error persists, verify that the card is formatted to FAT32, not exFAT or NTFS.
- Missing Games or Saves: Ensure you copied the entire
Nintendo 3DSfolder and not just contents within it. Also, check that you didn't accidentally create multiple subfolders during the transfer. The 3DS is very strict about folder hierarchy. - Slow Loading Times: Extremely cheap or off-brand SD cards can cause stuttering or long load times in games. Stick to reputable brands like SanDisk or Samsung, and look for Class 10 or UHS-I ratings for optimal performance.
Conclusion
Upgrading your storage is one of the best quality-of-life improvements you can make to your handheld console. By taking your time with the file transfer and ensuring your large-capacity cards are properly formatted to FAT32, you can enjoy an expansive digital library without ever losing your hard-earned game progress.