How to Use a 3/4 Portrait Reference: Artist Guide
Few angles in visual art are as versatile, expressive, and technically demanding as the three-quarter view. Working from a quality 3/4 portrait reference allows painters, illustrators, and 3D artists to capture the true sculptural depth of the human face and torso. Unlike a flat frontal mugshot or a stark silhouette profile, the three-quarter angle reveals the undulating planes of the cheeks, the projection of the nose, and the curvature of the brow all at once.

However, translating a 3/4 reference into a convincing piece of art requires more than simply copying shapes. It demands an understanding of cranial anatomy, perspective foreshortening, and light behavior. This guide breaks down how to select, read, and construct artwork using three-quarter references effectively.
Understanding the Three-Quarter Perspective
In portraiture, the term "three-quarter" can refer to two distinct concepts: framing and head rotation.
- Head Rotation (The 3/4 View): The subject turns their head roughly 45 degrees away from the viewer. In this orientation, one side of the face is broad and directly facing the camera, while the opposite side recedes in sharp perspective.
- Body Framing (The 3/4 Shot): In photography and classical painting, this crops the subject from approximately mid-thigh or knees up. It balances environmental context with personal expression.
For most figurative artists, the head rotation is the primary challenge. Because the head is roughly spherical with planar angularities, turning it off-center shifts every single alignment axis from straight parallel lines into elliptical curves wrapping around a cylinder.
Critical Anatomical Landmarks in the 3/4 View
When studying a reference photo, beginners often make the mistake of drawing features—eyes, nose, mouth—as isolated stickers placed onto a flat outline. To build structural integrity, you must locate key skeletal landmarks before rendering any detail.
1. The Facial Centerline
The vertical axis does not travel straight down. It follows the volume of the skull, curving over the forehead, dipping at the glabella (the indentation between the eyebrows), protruding over the bridge and tip of the nose, descending through the philtrum, and curving around the barrel of the mouth to the chin. Tracking this line across your reference prevents the facial features from sliding off-kilter.
2. The Far Contour (The Profile Break)
The most distinctive element of a 3/4 head reference is the outer silhouette of the far side of the face. In an ideal 3/4 angle, the far cheekbone, the outer curve of the eye socket, and the corner of the lips create a staggered, stepped contour:
- The brow ridge steps inward toward the eye socket.
- The zygomatic arch (cheekbone) steps outward.
- The line tucks inward toward the cheek flesh.
- The mouth barrel steps outward at the upper and lower lips.
- The jawline sweeps downward into the chin.
Pay careful attention to whether the nose extends past the boundary of the far cheek. If the tip of the nose breaks the cheek contour, the head is rotated further toward profile; if contained entirely within the cheek boundary, it is closer to a frontal pose.
3. The Foreshortened Far Eye
Perspective compresses the eye furthest from the viewer horizontally, but not vertically. The far eye should be narrower in width than the near eye, yet roughly the same height. Furthermore, notice how the bridge of the nose often overlaps and partially obscures the tear duct (caruncle) of the far eye in dynamic 3/4 poses.
Video: drawing faces from any angle ✶⋆.˚

4. Ear Placement and the Jawline
A classic pitfall is placing the ear too close to the eye. On a real skull, the ear canal sits directly behind the jaw hinge, roughly halfway back into the depth of the head. When viewed at a 45-degree angle, the near ear appears pulled further back than anticipated, situated behind the rear boundary of the mandible.
Choosing the Right 3/4 Portrait Reference for Your Artwork
Not all reference photos are created equal. Poorly composed or badly lit references can actively hinder your ability to understand three-dimensional form. When sourcing or shooting a 3/4 portrait reference, look for the following characteristics:
Directional, High-Contrast Lighting
Avoid references shot with direct, front-facing flash or flat indoor lighting. Flat light washes out planar transitions and hides bone structure. Instead, seek references lit by a single dominant light source (such as Rembrandt lighting or form lighting from a 45-degree overhead angle). This generates a distinct "terminator line"—the boundary where light turns to shadow—which maps out the structural planes of the forehead, temples, cheekbones, and jaw.
Appropriate Focal Length
Selfies and smartphone portraits taken with wide-angle front-facing cameras (equivalent to 24mm or 28mm lenses) cause severe perspective distortion. They exaggerate the size of the nose, shrink the ears, and round out the skull unnaturally. For accurate anatomical proportions, select references photographed with a focal length of 70mm to 105mm, which flattens distortion and depicts true structural relationships.
Dynamic Expression and Head Tilt
Human heads rarely sit purely level when turned. The most engaging references feature subtle tilts—such as the chin tilting downward (declination) or upward (inclination). These tilts introduce a secondary axis of perspective, forcing the horizontal brow line, eye line, and base of the nose into curved ellipses that make the final portrait look grounded and alive.
Step-by-Step Method for Working from 3/4 References
To avoid feeling overwhelmed by micro-details like eyelashes and pores, follow a structured observational pipeline from large masses to minor accents:
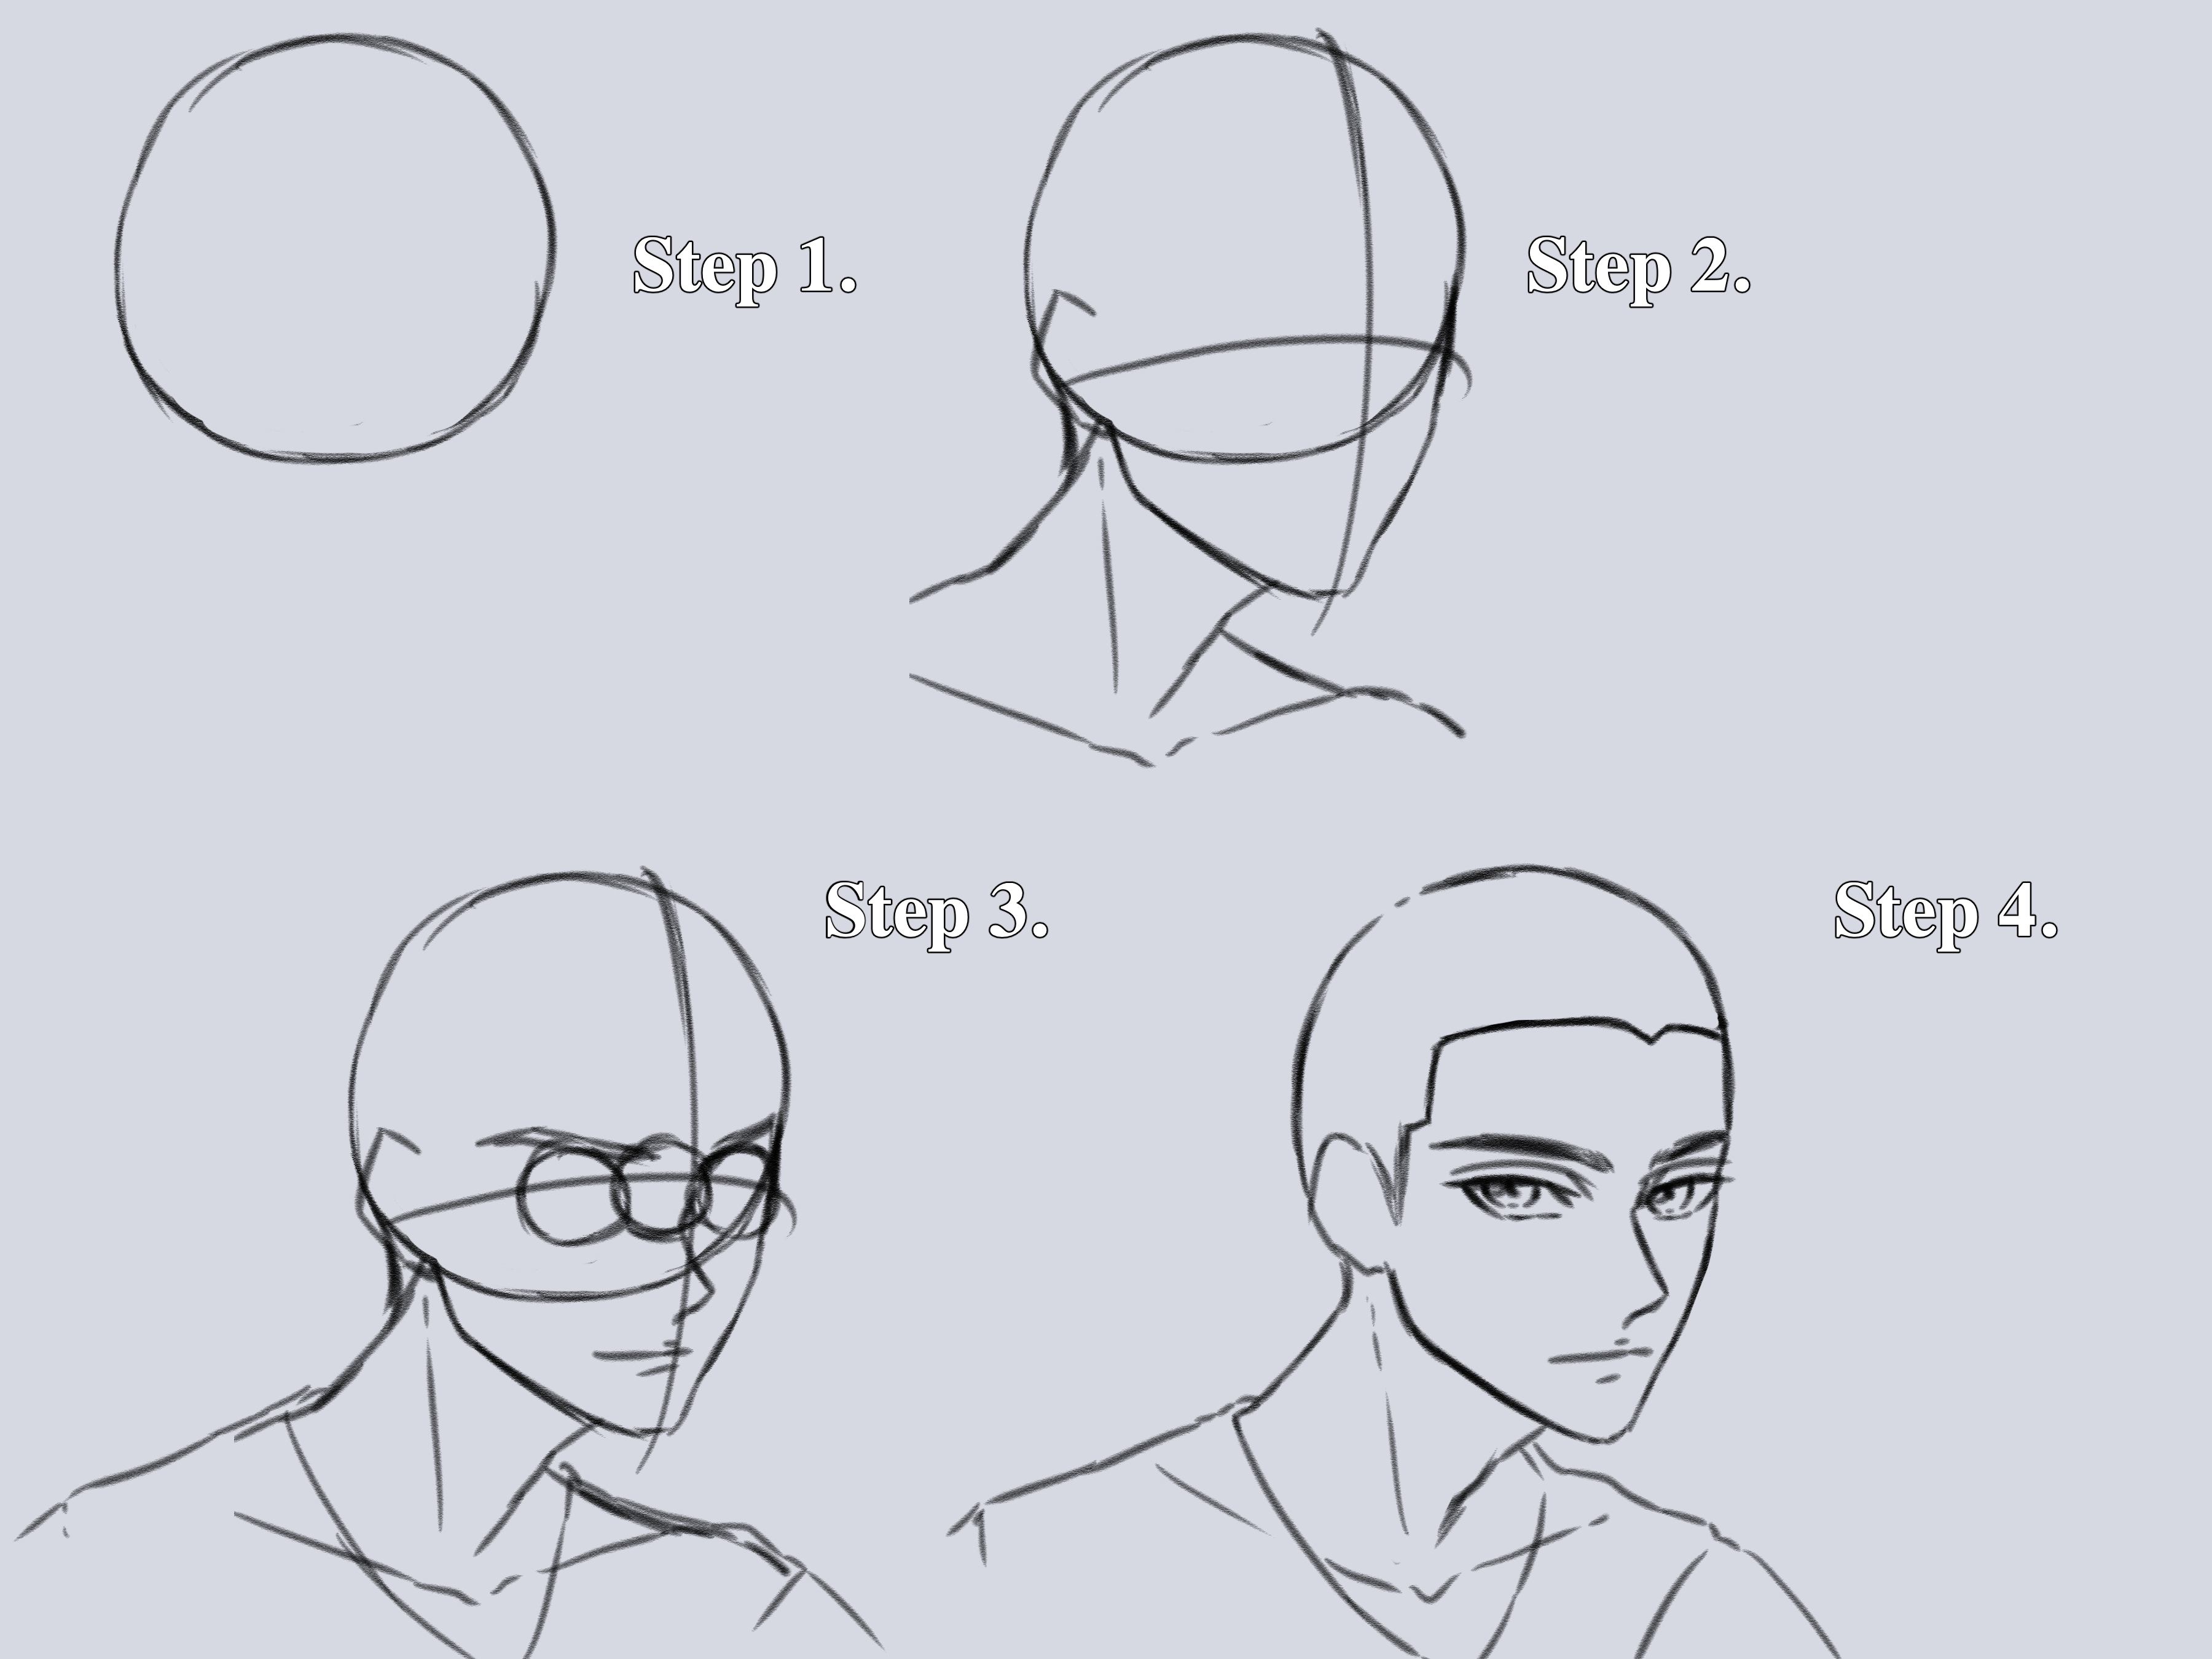
- Primary Cranial Mass: Block in the basic cranial ball and jaw block using a construction framework like the Loomis or Reilly method. Establish the tilt and perspective grid of the head.
- Identify the Shadow Shapes: Squint at your reference to strip away texture. Group values into a clean two-tone map: areas in direct light versus areas in core shadow.
- Carve the Facial Planes: Block in the planar shifts of the nose box, the eye sockets (orbits), and the flat surface of the cheeks.
- Position Features Along Perspective Ellipses: Ensure both eyes, the nostrils, and the mouth corners follow the same perspective arc wrapping around the face.
- Refine Edges and Ambient Occlusion: Soften transitions where the form turns gradually (like the forehead and cheeks), and sharpen transitions at cast shadow boundaries (under the nose, below the lower lip, beneath the chin).
Final Thoughts
Working from a 3/4 portrait reference provides a bridge between mechanical construction and realistic observation. By learning to deconstruct the image into underlying volumes, perspective planes, and cohesive light logic, you eliminate guesswork. Instead of simply replicating pixels or copying a photograph line by line, you begin to construct a believable human head that possesses genuine weight, volume, and presence on the canvas.