Replacement General Electric Range Knobs Guide
Dealing with a cracked, loose, or completely broken stove knob can make cooking frustrating and your kitchen look unkempt. Fortunately, replacing General Electric range knobs is one of the easiest and most cost-effective DIY appliance repairs you can tackle. You do not need to call a repair technician or buy expensive tools; in most cases, a simple visual inspection and a quick online search are all it takes to get your stove working like new again.

Whether you have an older GE gas cooktop with heavy metal dials or a modern smooth-top electric range with sleek plastic knobs, understanding how to identify, source, and install the correct replacements ensures a secure fit and safe operation.
Identifying Your GE Range Knob Requirements
Before you buy a new set of dials, you need to know the exact specifications of your current hardware. Not all General Electric range knobs are universal, even within the same brand family. Stove designs change across model years, and mixing up a D-shaft design with a round-shaft design means the knob simply won't grip the valve stem.
Locating Your Model Number
The most reliable way to find compatible replacement parts is by referencing your appliance's specific model number. Do not rely solely on the general appearance of the stove. GE manufactures hundreds of configurations that look nearly identical on the outside but use completely different internal valves and shaft orientations.
You can typically find the model number sticker in one of the following locations:
- Along the outer frame of the oven door opening
- On the side or bottom of the storage drawer (broiler drawer)
- On the side panel behind the cooktop or control panel area
- On the user manual or original purchase paperwork
Checking the Shaft Style
Remove one of your existing knobs by pulling it straight off the control panel. Look at the interior receptacle where the knob slides onto the stove's metal or plastic stem. Common styles include:
- D-Shaped Shafts: The stem has a flat side resembling the letter 'D', and the knob interior matches this shape to prevent spinning.
- Splined (Notched) Shafts: The stem features multiple tiny ridges or teeth that line up with grooves inside the knob collar.
- Molded spring-clip inserts that require a firm push to lock onto a plain cylindrical stem.
OEM vs. Aftermarket General Electric Range Knobs
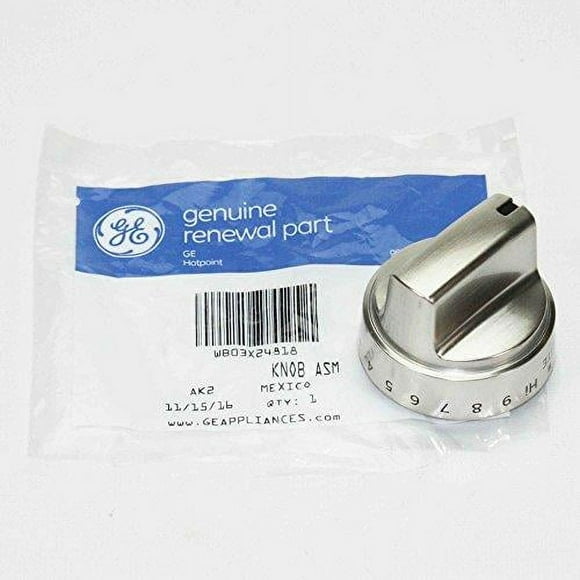
Video: HPUY WB03X24818 Gas Stove Knob Replacement for GE Stove Knobs and Oven Knobs Installation

When shopping for replacements, you will generally choose between Original Equipment Manufacturer (OEM) parts and aftermarket alternatives. Both have distinct advantages depending on your budget and priorities.
OEM Parts
OEM knobs are manufactured by General Electric or authorized partners to the exact factory specifications of your appliance. They guarantee an exact color match, identical weight, and proper heat resistance. While they usually cost a bit more, OEM parts eliminate the guesswork regarding durability and fit.
Aftermarket Alternatives
Aftermarket manufacturers produce third-party knobs designed to fit popular GE models. These are often sold in multi-packs online, which is ideal if you want to replace all your knobs at once so they match evenly. Always read customer reviews carefully to ensure that third-party plastic isn't prone to melting near high-heat burners.
Step-by-Step Installation Guide
Replacing your range knobs takes less than five minutes. Follow these simple steps to ensure a secure installation without damaging your stove's control valves.
- Turn Off the Burners: Ensure all burner controls are clicked firmly into the 'Off' position before you begin working.
- Remove Old Knobs: Grip the faulty knob firmly with your fingers and pull straight out toward you. Avoid using pliers or screwdrivers as levers against the stainless steel or enamel control panel, as this can easily scratch or dent the surface. If a knob is stuck due to grease buildup, wrap a warm, damp microfiber cloth around the base for a few minutes to loosen the residue.
- Inspect the Valve Stem: Look closely at the exposed metal or plastic shaft protruding from the stove. Check for bent pins, built-up grease, or remnants of a broken plastic shaft sleeve left behind from the old knob. Clean the stem thoroughly with a mild degreaser and dry it completely.
- Align and Push the New Knob: Match the orientation of the interior D-shape or splines inside the new General Electric range knob to the position of the valve stem. Push the knob straight back onto the stem until it sits flush against the control panel bezel. Do not force it at an angle, or you may crack the internal housing.
- Test the Operation: Press the knob in (if required for your safety ignition model) and turn it through its full range of motion. Ensure it does not rub against the control panel and that the indicator arrow points accurately to the 'Off', 'Low', and 'High' positions.
Tips to Extend the Lifespan of Your Stove Knobs
High temperatures, heavy grease, and daily wear and tear can degrade plastic and metal components over time. You can protect your investment by following a few simple maintenance habits:
- Clean Gently: Remove the knobs and wash them in warm, soapy water weekly. Avoid harsh scouring pads or abrasive chemical cleaners that can rub off the printed temperature indicators.
- Avoid Direct Heat Exposure: If you use oversized pots and pans that overhang the front burners, intense radiant heat can warp nearby plastic dials. Center your cookware properly on the grates or burners.
- Replace as a Set: If one plastic knob snaps due to brittle aging, the others are likely close behind. Buying a full set ensures uniform appearance and prevents future cooking disruptions.
Taking care of your kitchen hardware doesn't have to be complicated. By sourcing the correct parts with your model number and installing them carefully, your stove will look polished and function safely for years to come.