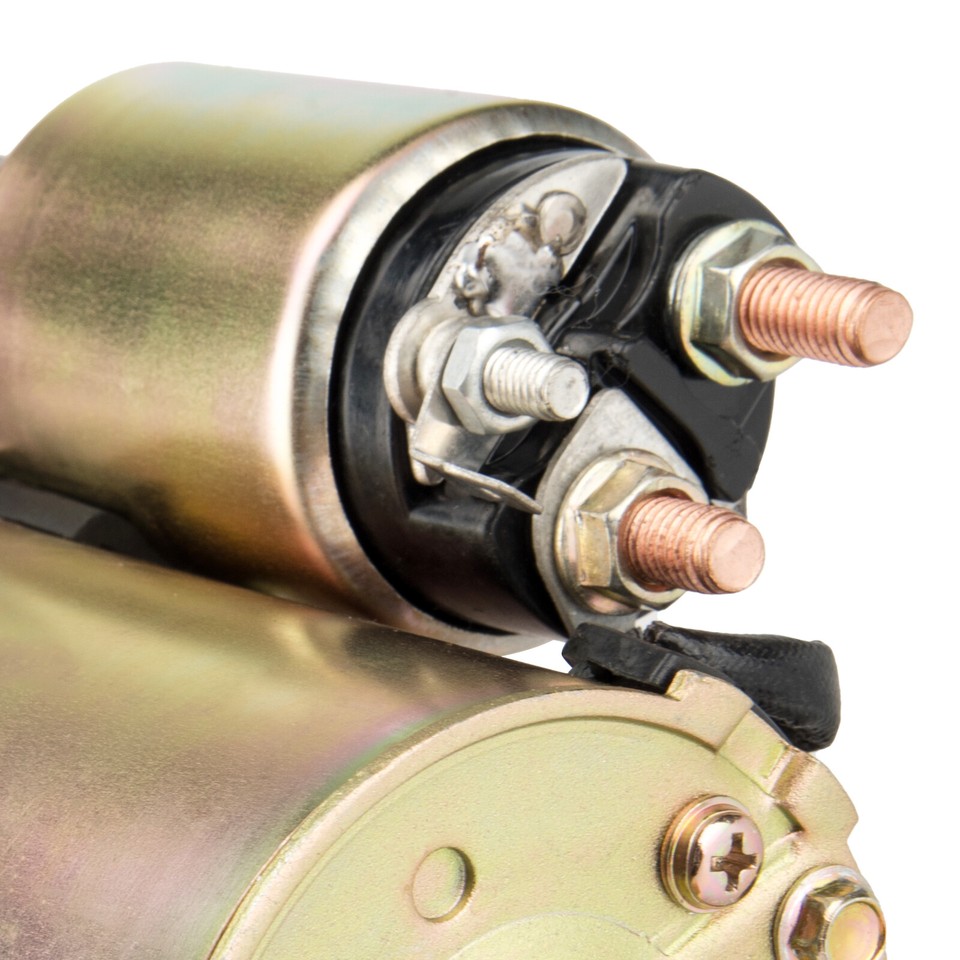
Replacing the Starter for 95 Ford F150: A DIY Guide
Few things are more frustrating than turning the key in your classic pickup and hearing nothing, or worse, just a rapid clicking sound. If your truck refuses to crank, you likely need a new starter for 95 Ford F150 models. Fortunately, replacing the starter on a mid-90s Ford with the legendary 4.9L inline-six, 5.0L V8, or 5.8L Windsor engine is a classic DIY job that requires only basic hand tools and a free afternoon.

Whether your old unit is heat-soaked, has dead spots on the electric motor, or has completely stripped bendix gears, tackling this project yourself will save you hundreds of dollars in mechanic labor. Here is everything you need to know to diagnose the issue, select the right part, and complete the installation safely.
Diagnosing Starter Problems on a 1995 Ford F150
Before you unbolt anything, make sure the starter is actually the culprit. Many drivers replace a starter only to discover the problem was a weak battery, corroded terminals, or a bad ignition switch.
Common Symptoms of a Failing Starter
- Single Loud Click: You turn the key, the starter solenoid engages, but the motor refuses to spin.
- Rapid Clicking: Usually indicates low battery voltage, but can also mean the starter motor is drawing too much current.
- Whining or Grinding: The starter gear (bendix) is failing to mesh properly with the truck's flywheel teeth.
- Intermittent Starting: The truck starts fine when cold, but refuses to crank after a long highway drive due to heat soak.
Quick Diagnostic Tests
- Check Battery and Cables: Ensure your battery is fully charged (12.6 volts or higher) and that the positive and negative terminals are clean and tight.
- The Hammer Trick: Have a helper turn the key while you gently tap the starter body with a hammer or wrench. If the truck suddenly starts, your starter motor has dead spots and needs replacement.
- Voltage Drop Test: Use a multimeter to check if power is reaching the small trigger wire at the starter solenoid when the key is turned to the 'Start' position.
Tools and Supplies Needed
Gather your equipment before crawling under the truck to make the job go smoothly. You will need:
- Replacement starter motor (ensure it matches your specific transmission—automatic vs. manual trucks often use different starters).
- Socket set (specifically 3/8-inch and 1/2-inch drives, with deep wells and extensions).
- Combination wrenches (typically 1/2-inch and 9/16-inch for battery and solenoid terminals).
- Jack and sturdy jack stands (never work under a vehicle supported only by a hydraulic jack).
- Wheel chocks.
- Safety glasses and gloves.
- Wire brush and electrical contact cleaner.
Step-by-Step Replacement Guide
Take your time and follow these sequential steps to remove the old unit and install the new starter for 95 Ford F150 trucks.
Step 1: Disconnect the Battery
Safety comes first whenever you work with vehicle electronics. Locate the battery under the hood and use a wrench to disconnect the negative (-) battery cable. Tuck the cable safely aside so it cannot accidentally spring back and make contact with the terminal while you are working underneath.
Step 2: Elevate and Secure the Vehicle
Park your F150 on a flat, level surface and apply the emergency parking brake. Chock the rear wheels. Use a hydraulic floor jack to raise the front end of the truck safely, then place heavy-duty jack stands beneath the frame rails. Give the truck a firm shake to ensure it is completely stable before sliding underneath.
Step 3: Locate and Disconnect the Starter Wiring

The starter is mounted low down on the passenger side (right side) of the engine block, near the back where the engine meets the transmission bellhousing.
Before removing the mounting bolts, take off the rubber boots and disconnect the electrical wires attached to the starter solenoid:
- Remove the nut securing the heavy battery cable.
- Remove the nut or disconnect the push-on connector for the smaller ignition switch wire (starter relay signal).
Tip: Take a quick photo with your smartphone before disconnecting the wires so you can reference the exact routing later.
Step 4: Remove the Mounting Bolts
Depending on your exact engine size, your F150 starter will be held in place by either two or three bolts. These bolts thread directly into the transmission spacer plate or bellhousing.
Support the weight of the starter with one hand while removing the final bolt. The starter is surprisingly heavy—usually weighing between 8 and 12 pounds—so be prepared for it to drop once the last bolt is free. Maneuver it carefully out of the chassis gap.
Step 5: Compare Old and New Units
Before installing your new part, place it side-by-side with the old starter. Check the nose cone shape, the gear tooth count, and the positioning of the electrical studs. A mismatched part will either fail to bolt up correctly or cause severe damage to your flexplate/flywheel teeth.
Step 6: Install the New Starter
Maneuver the new starter into position against the transmission housing. Support its weight with one hand while threading in the mounting bolts by hand to prevent cross-threading. Once all bolts are threaded properly, torque them down securely to factory specifications (typically around 15-20 ft-lbs, but check your manual).
Reconnect the electrical wiring:
- Attach the main positive battery cable to the primary terminal and tighten the nut securely (do not overtighten, as the internal post can snap).
- Connect the small trigger wire to the solenoid spade terminal or small post.
- Slide the rubber protective boots back over the terminals to prevent corrosion and accidental short circuits.
Step 7: Final Testing
Lower the truck off the jack stands. Reconnect the negative battery cable under the hood. Climb into the cab, press the brake pedal, and turn the key. The engine should crank vigorously and fire right up. Listen closely for any strange grinding noises, which would indicate improper gear engagement requiring immediate shutdown and re-alignment.
Maintenance Tips for Longevity
To ensure your new starter has a long lifespan, address any underlying issues that caused the original unit to fail. Oil leaks from the valve cover or rear main seal frequently drip onto the starter below, swelling the internal rubber components and causing electrical shorts. Wash away accumulated grime, fix any engine leaks promptly, and keep your battery fully charged to reduce electrical strain.