Toro Recycler 22 Blade Removal Guide
Maintaining your lawn mower is essential for a healthy, green yard, and sharpening or replacing the cutting blade is a key part of that routine. If you own one of Toro's popular walk-behind mowers, mastering toro recycler 22 blade removal is a straightforward DIY task that saves you a trip to the repair shop. Whether your blade is dull, nicked from hitting a stray rock, or you simply want to swap it out at the end of the season, doing it yourself takes less than thirty minutes with the right tools.
Before you begin, safety must be your top priority. Working underneath a lawn mower can be dangerous if the engine accidentally turns over. This guide will walk you through the necessary safety precautions, required tools, and a step-by-step process to get the job done smoothly.
Tools Needed for Toro Recycler 22 Blade Removal
Having your tools organized before you start makes the process much faster. You likely already have most of these items in your garage or tool shed:
- Work gloves (heavy-duty leather or cut-resistant gloves)
- Socket wrench set (typically a 9/16-inch socket for Toro mowers)
- Breaker bar or ratchet extension for extra leverage
- A wooden block or a dedicated blade-locking tool
- Wire brush and a clean rag
- Safety glasses
- Torque wrench (recommended for reinstallation)
Step-by-Step Toro Recycler 22 Blade Removal Instructions
Follow these precise steps to remove the cutting blade from your Toro Recycler 22 safely and efficiently.
1. Prepare the Mower Safely
Never work on a lawn mower while the engine is hot or connected to a power source. If you have a gas-powered Toro Recycler 22, start by disconnecting the spark plug wire. Push the rubber boot firmly off the metal terminal of the spark plug and tuck it away to ensure it cannot accidentally spring back and make contact. Next, empty the fuel tank or run the mower until it is completely out of gas. If you must tip the mower, always tilt it backward with the spark plug pointing up and the carburetor facing the sky. Tipping it toward the carburetor will flood the air filter and engine with gasoline and oil.
2. Secure the Blade from Turning
The blade bolt is torqued down tightly at the factory to prevent it from spinning loose during operation. When you apply pressure with your wrench, the blade will naturally want to spin. To prevent this, wedge a sturdy block of wood between the cutting blade and the mower deck housing. As you turn the bolt counter-clockwise, the blade will jam against the wood block, locking it in place. Alternatively, you can use a commercial blade-locking tool designed to clamp onto the edge of the deck and hold the blade stationary.
Video: Replacing the Mower Blade - Toro Recycler 22
3. Loosen and Remove the Blade Bolt
Put on your heavy work gloves to protect your hands from the sharp cutting edges of the steel. Fit your 9/16-inch socket onto the center bolt securing the blade to the crankshaft. Turn the bolt counter-clockwise (to the left, or "measurey-loosey"). If the bolt is heavily rusted or stuck tight, use a breaker bar or tap the handle of your ratchet lightly with a hammer to break the friction. Once the bolt breaks loose, unscrew it completely by hand. Support the blade with your other hand so it doesn't fall unexpectedly.
4. Take Off the Blade and Supports
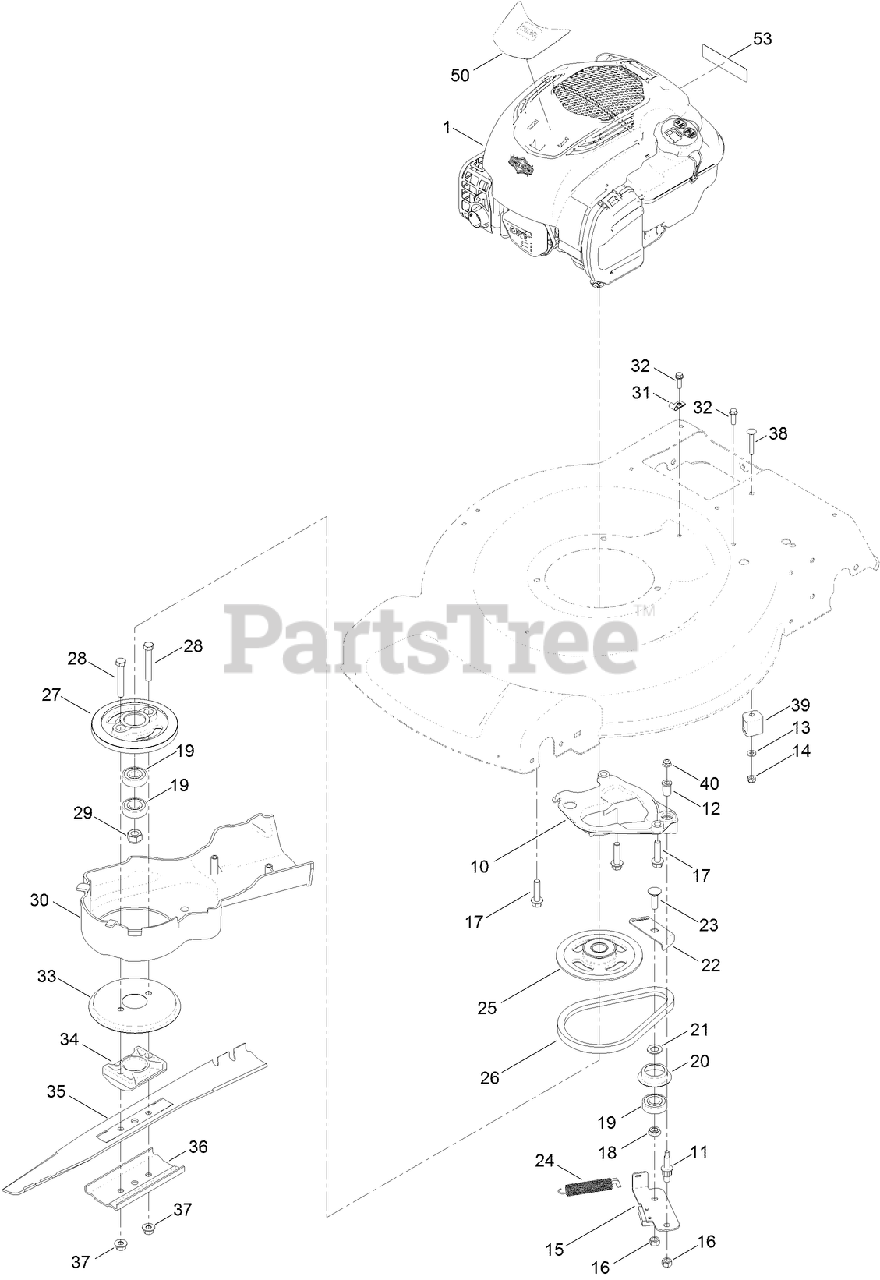
Slide the metal blade off the center alignment posts on the blade driver. Pay close attention to the orientation of the parts as you take them off. The Toro Recycler 22 typically features an anti-scalp cup or a stiffening washer between the bolt and the blade. Take note of which side of the blade faces the ground. Generally, the stamped cutting edge and the curved sails (wings) point upward toward the engine deck to lift grass clippings into the bag or mulch them effectively. Putting a new blade on upside down will result in very poor cutting performance.
Inspecting and Cleaning the Deck Area
Now that the blade is removed, you have a rare opportunity to clean the underside of your mower deck. Dried grass clippings trap moisture, which accelerates rust and corrosion on the steel deck. Use a putty knife or wire brush to scrape away compacted grass and debris around the spindle shaft. Wipe the area clean with a rag. Inspect the blade bolt and washers for any signs of stripping, bending, or excessive wear. If the bolt threads look damaged, replace the bolt immediately before putting a new blade on.
How to Reinstall the Blade Correctly
Putting the blade back on is essentially the reverse of the removal process, but accuracy matters for safety.
- Positioning: Place the new or sharpened blade onto the shaft support posts, ensuring the curved "sails" face upward toward the inside of the mower deck and away from the ground.
- Hardware: Reinstall any cup washers or stiffening supports in their original sequence. Thread the blade bolt in by hand first to ensure you don't cross-thread it.
- Torquing: Use your wood block to hold the blade in place again. Tighten the bolt using a torque wrench. Toro generally recommends tightening the blade bolt to between 50 and 60 foot-pounds of torque. Proper torque ensures the blade won't vibrate loose during use.
- Final Check: Rotate the blade manually by hand to make sure it spins freely and doesn't strike any part of the mower housing or baffling. Reconnect the spark plug wire securely.
Conclusion
Performing a Toro Recycler 22 blade removal is a simple maintenance task that keeps your lawn looking pristine and extends the life of your equipment. By taking the proper safety precautions, protecting your hands, and securing the blade correctly during reassembly, you can complete this task in minutes. Regular blade care ensures clean cuts that promote healthy turf grass growth season after season.