Utile Showers Review: Pros, Cons & Installation
Remodeling a bathroom often brings a dreaded decision: do you spend days painstakingly laying tile and grout, or do you settle for a cheap-looking plastic surround? If you want the high-end look of tile without the maintenance nightmare of scrub-heavy grout lines, Utile showers by American Standard present an intriguing middle ground. Utilizing engineered composite materials, this system aims to give homeowners a durable, modern, and watertight showering space in a fraction of the time traditional tiling requires.

In this comprehensive guide, we will break down what Utile showers are, how the installation process works, their pros and cons, and whether they are worth the investment for your next home improvement project.
What Are Utile Showers?
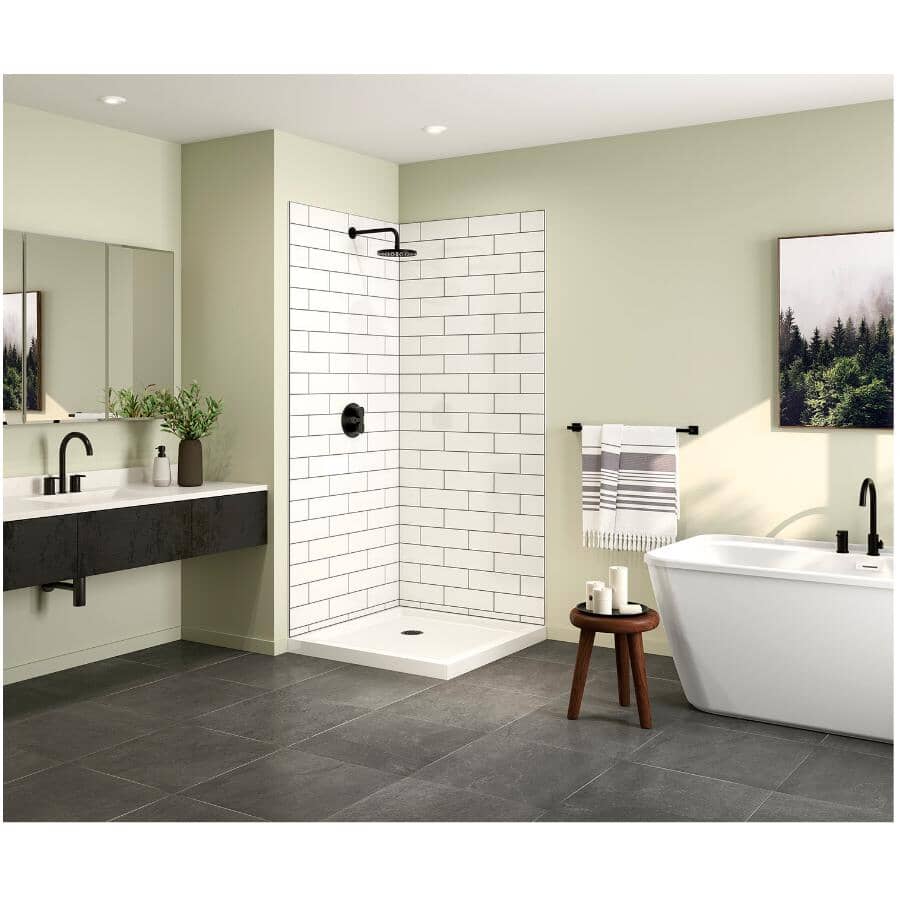
Manufactured by American Standard, the Utile shower system is a collection of direct-to-stud, interlocking wall panels made from high-strength engineered composite stone. Unlike traditional fiberglass surrounds that feel flexible and hollow, Utile walls are rigid, heavy, and mimic the texture, depth, and visual appeal of real stone or ceramic tile.
The core philosophy behind Utile is "tile without the tile." Because there are no actual grout lines, you eliminate the most common failure point in showers: water seepage, mold growth, and endless scrubbing. The panels lock together tightly using a tongue-and-groove system, creating a waterproof barrier when sealed correctly during installation.
Key Features and Design Options
Utile shower systems are designed to fit standard alcove spaces as well as custom-configured neo-angle or corner showers. They come in a variety of styles, colors, and textures that cater to modern aesthetic trends.
- Visual Textures: Options range from subway tile patterns to smooth marble finishes and slate textures.
- Built-In Storage: Many Utile kits include matching recessed shelving units or corner caddies that integrate seamlessly into the panel design.
- Color Consistency: Because the color runs throughout the engineered material rather than just sitting on the surface, minor scratches are far less noticeable.
Pros of Choosing Utile Showers
Homeowners and contractors alike gravitate toward the Utile system for several distinct advantages over traditional tile and basic acrylic kits.
1. Fast Installation
Traditional tile installations can take anywhere from a few days to a week once you factor in backer board installation, waterproofing, tile setting, and grouting/sealing. In contrast, an experienced DIYer or professional can install Utile shower walls in just a few hours once the plumbing and framing are prepped.
2. Low Maintenance and Grout-Free
Grout is porous, meaning it absorbs soap scum, body oils, and moisture, making it a breeding ground for mold and mildew. Utile’s solid surface panels wipe clean easily with a mild soap and a microfiber cloth, saving you hours of scrubbing.
3. Premium Aesthetic
Cheaper acrylic wall panels often look shiny, flexible, and distinctly budget-friendly. Utile panels have a matte, textured finish that closely replicates high-end stone or ceramic tile, significantly boosting the visual appeal of your bathroom.
Cons and Potential Drawbacks
While the system is innovative, it is not entirely without flaws. Keep these limitations in mind before making a purchase.
- Weight: Because the panels are made of engineered composite stone, they are quite heavy. You will likely need two people to safely carry and position them during installation.
- Strict Framing Requirements: The wall studs must be plumb, square, and properly spaced. If your framing is even slightly off, getting the tongue-and-groove panels to lock flush can become a frustrating challenge.
- Upfront Cost: Utile kits are more expensive than basic fiberglass or acrylic surrounds, though they are usually comparable to or cheaper than a professional custom tile job.
Overview of the Installation Process
While installing Utile showers is significantly easier than laying tile, it still requires precision and attention to detail. Here is a brief look at the steps involved:
- Prep the Studs: Ensure all wall studs are straight, plumb, and reinforced where necessary for grab bars or shower fixtures.
- Install the Shower Base: Set the American Standard shower pan (or compatible base) level on a mortar bed to ensure a solid, non-flexing foundation.
- Dry Fit the Panels: Before applying any adhesive, dry-fit the wall panels to check for squareness and mark where your plumbing fixtures will poke through.
- Apply Adhesive and Sealant: Use the manufacturer-recommended construction adhesive on the back of the panels and press them firmly against the studs. Apply the included silicone sealant to all corner joints and seams to ensure total waterproofing.
- Cure Time: Allow the silicone and adhesive to cure completely—typically 24 hours—before using the shower.
Pricing and Value
A complete Utile shower kit—including the base, wall panels, and sometimes doors—typically ranges from $1,000 to $2,500 depending on the size and style. When compared to hiring a tile contractor (which can easily exceed $4,000 to $7,000 for labor and materials), Utile offers exceptional value, especially for DIYers looking to save on labor costs.
Final Verdict: Are Utile Showers Right for You?
If you want the sophisticated look of a tiled shower without the ongoing headache of scrubbing grout lines or paying for expensive professional masonry, Utile showers are a fantastic investment. They bridge the gap between budget acrylic surrounds and high-end custom tile, offering durability, style, and a straightforward installation process that busy homeowners will appreciate.


