Vevor Steel Landscape Edging: Review & Install Guide
Creating clean, crisp lines between turf, mulch, and gravel is one of the most effective ways to elevate your yard's curb appeal. While black plastic edging turns brittle under UV exposure and wood rots over time, steel offers a permanent, architectural aesthetic. In recent years, vevor steel landscape edging has emerged as a top-selling DIY option, promising commercial-grade steel performance at a fraction of the cost of boutique landscape supply brands.
Whether you are designing meandering flower beds or sharp, geometric gravel walkways, this guide breaks down everything you need to know about Vevor's steel edging—including specs, design flexibility, and real-world installation advice to avoid common pitfalls.
Why Choose Vevor Steel Landscape Edging?
Traditional steel edging from local nurseries or wholesale suppliers often comes in rigid 10-foot or 20-foot commercial lengths that require a flatbed truck and multiple workers to transport and install. Vevor solves this logistical headache by selling modular sets (typically packs of 3 to 10 strips) ranging between 39 and 40 inches per piece. These pack flat into standard shipping boxes that can be delivered straight to your doorstep.
Beyond convenience, several features make it a compelling choice for homeowners and light-commercial landscapers:
- Durability and Strength: Manufactured from galvanized or carbon steel, these strips withstand weed whackers, lawn mower wheels, and accidental foot traffic that typically shatters vinyl and plastic borders.
- Malleability: Despite its structural rigidity, the steel remains thin enough (usually around 1.5 mm / 16-gauge equivalent) to bend cleanly by hand or over a curved surface, allowing you to create smooth, flowing curves without kinking.
- Interlocking Connection System: Each piece features integrated fastener tabs and slots. This creates a continuous, unbroken barrier that prevents grass runners and creeping weeds from pushing between joints.
- Cost-to-Value Ratio: Vevor typically retails at 30% to 50% less than established landscape brands like Col-Met, making it an attractive option for extensive perimeter runs.
Available Styles, Heights, and Finishes
Vevor produces several variations of its steel border kits. Choosing the correct style depends heavily on your soil type and design objectives:
1. Powder-Coated Black / Brown
Coated with an electrostatic outdoor powder finish, these strips offer a sleek, modern border. The coating protects the underlying carbon steel from moisture and premature oxidation. They work exceptionally well in modern minimalist yards, Japanese rock gardens, and clean mulch beds.
2. Corten-Style / Weathering Steel
Weathering steel develops a natural, protective patina of rust over several months. This rust layer acts as a barrier against deeper structural corrosion while giving beds an earthy, rustic appearance that blends seamlessly with native plantings and stone hardscapes.
3. Integrated Teeth vs. Stake-Driven Edging
Pay close attention to how the edging secures into the ground. Vevor offers two primary formats:
- Serrated / Toothed Bottoms: Stamped spikes line the bottom edge of each strip, allowing you to drive the edging directly into softer soils without separate stakes.
- Pocketed Strips with Ground Anchors: Flat-bottom strips that sit in a shallow trench and are held in place by separate steel ground stakes driven through punched slots. This style offers better vertical stability in rocky soils.
Step-by-Step Installation Guide
Installing metal borders looks straightforward, but poor preparation leads to uneven lines and wavy elevations. Follow these steps for professional results:
Step 1: Map the Border
Lay out garden hoses or heavy rope to mark your desired bed line. For straight runs, drive wooden stakes at each end and pull a tight mason line. Step back and inspect the curve or straight line from multiple viewing angles before digging.
Step 2: Trench the Ground

Even if you purchase the version with built-in spikes, do not attempt to sledgehammer these strips into dry, untilled soil. Doing so will bend the top lip and warp the metal tabs.
Use a flat-bladed spade or an edging tool to slice a narrow trench along your guide line. Aim for a depth roughly half the height of your edging strip. If working in dense clay or dry soil, wet the line heavily the day before to soften the ground.
Step 3: Pre-Bend Curves
Form curves before securing the strip in the ground. You can achieve smooth arcs by gently pressing the metal against a rigid round object, such as a 5-gallon bucket, a tree trunk, or an old tire. Take your time; making multiple soft bends produces a cleaner radius than trying to force a single sharp bend.
Step 4: Interlock the Pieces
Connect your sections end-to-end. Insert the tabs into the receiver slots and use a pair of pliers to crimp the locking tabs tightly. A snug mechanical connection keeps the border aligned during backfilling.
Step 5: Set and Protect
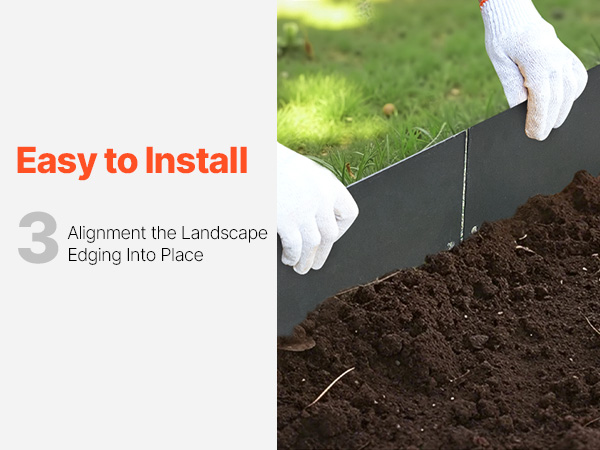
Place the connected strips into your trench. Check for an even top edge: typically, 1.5 to 2 inches of steel should remain exposed above the finished soil grade to prevent turf grass from jumping into mulch.
To drive the edging down to its final height, place a scrap block of wood (such as a 2x4 cutoff) over the top lip and tap the wood with a dead-blow mallet or hammer. Never strike the bare metal directly with a steel hammer, as this will chip powder-coated finishes and bend the metal edge.
Step 6: Backfill and Pack
Fill the trench on both sides with excavated soil. Tamp it down firmly with your foot or a 2x4 to lock the edging in place. Finish by applying mulch or decorative gravel on the garden side.
Real-World Performance: Pros and Cons
Before purchasing, keep these practical observations in mind:
The Upsides
- Clean sightlines: The thin profile (under 1/16-inch visible rim) creates sharp borders that make lawn cuts look tailored and intentional.
- Zero frost heaving: Unlike plastic edging that floats upward after freezing winter cycles, steel anchored below the surface remains stable year-round.
- Easy mowing: You can run mower tires directly along the border to trim turf edges without damaging the barrier.
The Trade-Offs
- Sharp stamped edges: Always wear heavy leather work gloves during handling. The punched tabs and stamped steel corners can be sharp out of the box.
- Gauge limitations: While suitable for typical residential gardens, Vevor's steel is slightly thinner than commercial 11-gauge borders. If you frequently drive heavy lawn tractors or utility vehicles across your bed boundaries, thicker structural steel is required.
- Scratch vulnerability: If the protective powder coating is scratched down to bare steel during installation, surface rust can appear in humid environments unless touched up with outdoor metal paint.
How It Compares: Steel vs. Aluminum vs. Plastic
| Material | Durability | Flexibility | Ease of Installation | Longevity |
|---|---|---|---|---|
| Vevor Steel | High | Medium-High | Moderate | 15–20+ Years |
| Commercial Aluminum | High (Rust-proof) | High | Easy | 25+ Years |
| Plastic / Vinyl Rolls | Low | Very High | Moderate | 3–5 Years |
Final Verdict
For residential homeowners looking to replace floppy plastic trim or crumbling wood borders, vevor steel landscape edging hits the sweet spot between structural durability, clean aesthetics, and affordability. Provided you prepare a proper trench and cushion your strikes with a wooden block during assembly, it delivers a high-end, designer border that will keep your beds pristine for years to come.


